It’s Time to Wax Your Chain
Whether you've been wax-curious but all your friends make fun of you, or you're a rabid anti-waxxer, this article is for you. It's time to #trustthescience on waxing your bicycle chain.
The groupchat is popping off stats from un-cited studies about how many watts you could save ("I'm looking for the link, dude, one sec!"). Maybe you read about some TDF winner getting their chain waxed before the deciding TT. You heard about the olympic track riders doing it. Most assuredly, the annoying permanently cat 4 with all the nicest and newest gear at your local race series was waxing his chain because he wouldn't shut up about it. Either way, it wasn't for the normal riders – it wasn't for you.

Why?
There are many reasons to wax your chain, and you've probably heard some version of all of them. The first is the efficiency gain. There have been countless studies (cited at the bottom) about how much more efficient a waxed drivetrain is than a traditionally wet lubed chain. If you don't normally clean the factory grease off your chain, then the efficiency gains are even higher. 10-20 watts makes a huge difference when you're stuck on the back of break away, or when it comes to how many calories you need to eat on a long ride.
Another great reason (especially if you live in a small New York apartment with non-cyclists) is the cleanliness. No more black stuff on your roommate (or wife's) clothes as they walk by. No more disgusting hands when you're putting your chain back on. No more embarrassing Cat 5 tattoo or ruined white socks. A waxed chain means a clean drivetrain means a clean bike. And we all know: A clean bike is a fast bike.
Lastly, the longevity. A waxed and maintained chain will easily last you 3 times as long as a wet lubed chain. Your chainrings, cassette, and pulley wheels all last longer too. This should matter to you for a number of reasons: not throwing stuff away, supply chain making it hard to find new parts, and reducing the amount of money you spend on this dumb sport.
How?
Cleaning
No matter the waxing process you choose, there is only one proper cleaning method. Note that you should be doing this cleaning method even if you are using traditional wet lube. The factory gunk is so slow!

Please follow through to the Silca site for how to do this properly but basically you're going to do some pretty serious stuff here. Get three empty Gatorade bottles. First you're going to strip all the factory gunk off with a non-polar solvent overnight. Next you will fill a bottle with a citrus degreaser and put the chain on in there. Now its time to shake. Take the chain out, dump out the degreaser and put some fresh stuff in there and shake again. Continue until the degreaser stays clean. Finally dip the chain into a bottle of polarized solvent like acetone. Allow the chain to dry before moving onto the next step.


Simple
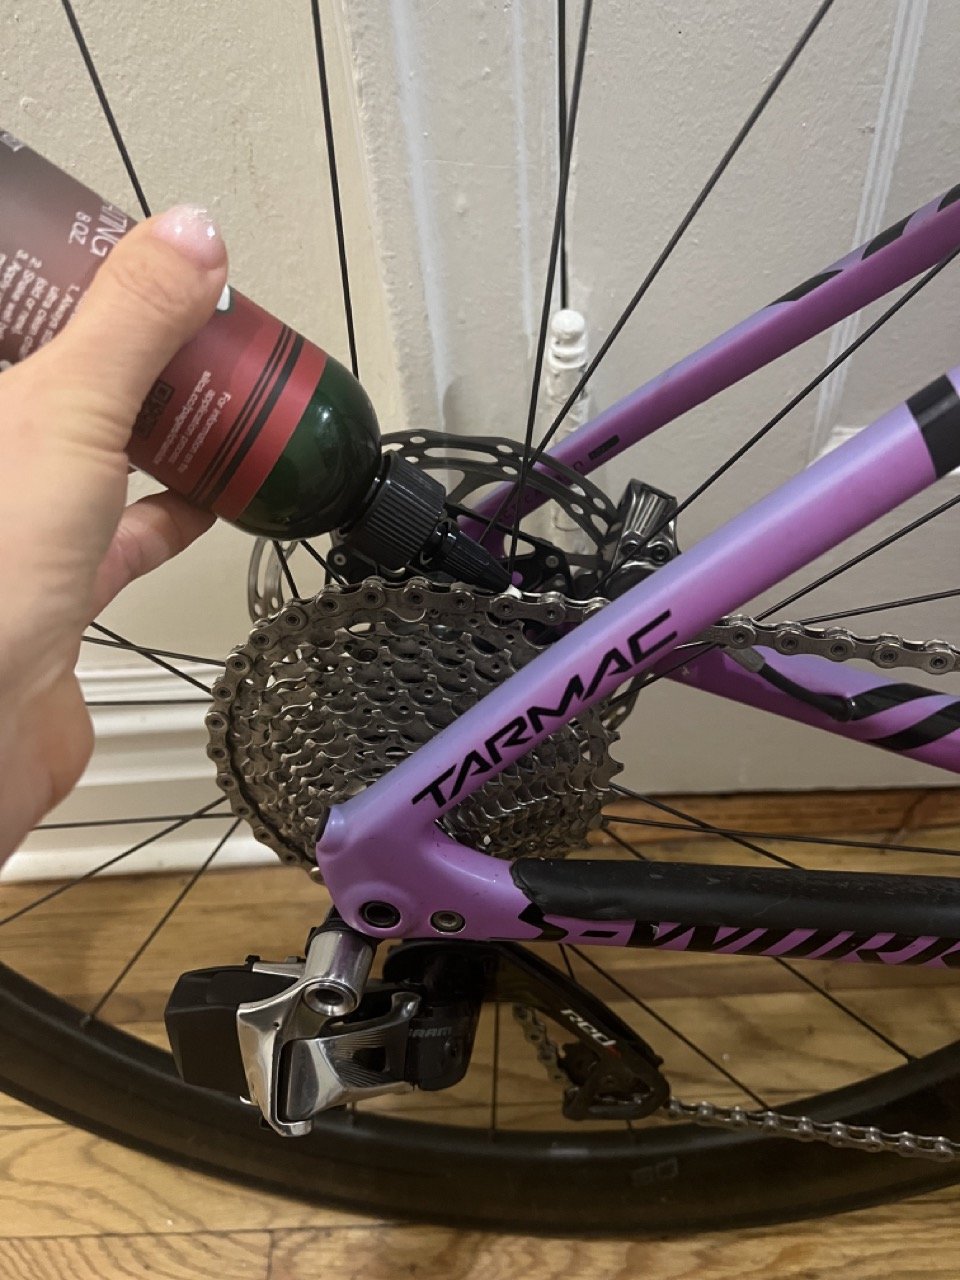
No crockpot required. After you've cleaned your chain the correct way, simply put your chain back on your bike, put the gearing into big ring and big cog (cross chaining). Shake the drip wax of choice real good and then take your time applying two drops of the stuff to each link. Move slowly, making sure you drip into the link. Once you've done the full chain, slowly backpedal so your chain does about 12 full cycles through the drivetrain. The last step is: Leave it be. 24 hours at least. Silca is the expert on chain waxing at this point, they sell a lot of very expensive lubrication items, but they say the drip wax is 98% as effective as the melt wax. When we get into the maintenance section, you'll get more of a rundown about why we recommend the drip wax method.

Hard
Buy wax pellets. You can pour them into a crockpot dedicated to waxing your chain if you want. Silca (and others) have heat safe bagged pellets that you can drop into a pot of boiling water (yes, we're gonna be sous vide-ing our chains, be sure to say this to your groupchat). Once you’ve got the wax melted, thread something like an unwound clothes hanger through one of the end links and fully submerge your CLEAN chain into melted wax. Let it simmer for a bit, making sure all the air bubbles get out and wax fully permeates the links. Turn the heat off, the wax in the pot or bag will begin to solidify. As it does, slowly pull your chain out. The idea here is to not have completely wet melted wax just "fall out" of the links. Leave the chain hanging over night and then install onto your bike.


Maintenance
Here's the fun part. Every 200 miles you'll need to reapply wax. Here's how I do it. After roughly every ride, I use a Silca gear wipe to wipe down the chain, pulley wheels, and chain rings. This takes roughly 60 seconds. At the end of every week, I apply a drop of Silca drip wax to each link, following the steps in the Simple Method above. This takes roughly 120 seconds. Because you need to do this every 200 miles, and because the drip wax is 98% as effective as melt wax, I advocate for skipping the melt wax method entirely. There are people who are doing the melt wax as part of their weekly normal life. I am not one of those people.
Every once in a while, you'll want to clean your chain. Follow the Gatorade bottle method with a simple degreaser, rinse with water and then use a dip in alcohol or acetone to evaporate any moisture. From here you can drip wax or melt wax.
Taking into account the reality that you should be stripping the factory gunk off no matter your lubrication method, I’m here to claim that waxing your chain is easier, faster, and cheaper than old school methods of chain lubrication. If you don’t believe me, please @ Silca and not me.
Lastly, if you are at all dubious of the watt gains from a waxed chain and if you are registered for any of the races I’m registered for, then I encourage you to NOT wax your chain — I need all the help I can get.
I like British cars, American guitars, Chinese food, and Italian bikes.