How to Pack Your Bike For Travel
Packing your bike for travel can be a time-consuming and stressful experience. Depending on your bike and bike bag, you may have to take off your fork, bars and seatpost which can be intimidating if you’re not an experienced and/or confident bike mechanic. (The first time I traveled with a road bike, I put my rear derailleur back on incorrectly and trying to ride with that was…interesting. I’ve learned since then!). Even if you are used to taking your bike apart, it can be difficult to figure out the best way to position and protect your frame for travel. But with practice and lots of photo documentation, I’ve found a system that works pretty well. It may be a little less convenient than renting a bike at your destination, but nothing beats riding your own bike on new roads.
I have a very small Orucase Sub62 bike bag. It’s fairly similar to the Orucase B2 or Post Carry Co case but without wheels. I assume Orucase doesn’t make this bag anymore because it’s much too small for anything larger than a 48-49 size frame — my partner tried to use this bag for his size 52 Specialized Allez and had to remove the crankset to get it to fit. It’s designed to measure under 62 linear inches to prevent oversize charges (JetBlue charged me an oversized fee once but that has not been typical in my experience). I’ve flown dozens of times with this bag and can get it all packed up in 30-45 minutes. This isn’t as quick as some of the larger bike bags, but on the plus side you can wear it like a backup and it fits in the back of most sedans —no XL Uber/Lyfts necessary. Some of the tips below are specific to a travel case that requires fork and handlebar removal, but other tips apply more generally.
To alleviate worries about the airline losing your bike, put an AirTag (or Tile) in your bag! This gives me so much peace of mind when traveling with my bike since I can see immediately if it’s landed at my destination or whether it’s been re-routed to some other random location.
The packing process
Throughout this whole process, take lots of pictures and videos! This is the most important thing you can do to make future assembly/disassembly easier. When putting my bike back together, it’s been so helpful to know how I stack my spacers, how the headset should look when properly assembled, where all the cables should go, etc.
Put your bike on a stand (if you have one) and take off all the small bits like your head unit mount, pedals and bottle cages. Put all the screws and bolts into a little ziploc bag and put your pedals in another little bag. I like to put bottles in the bottle cages to have fewer things rattling around the bike bag.

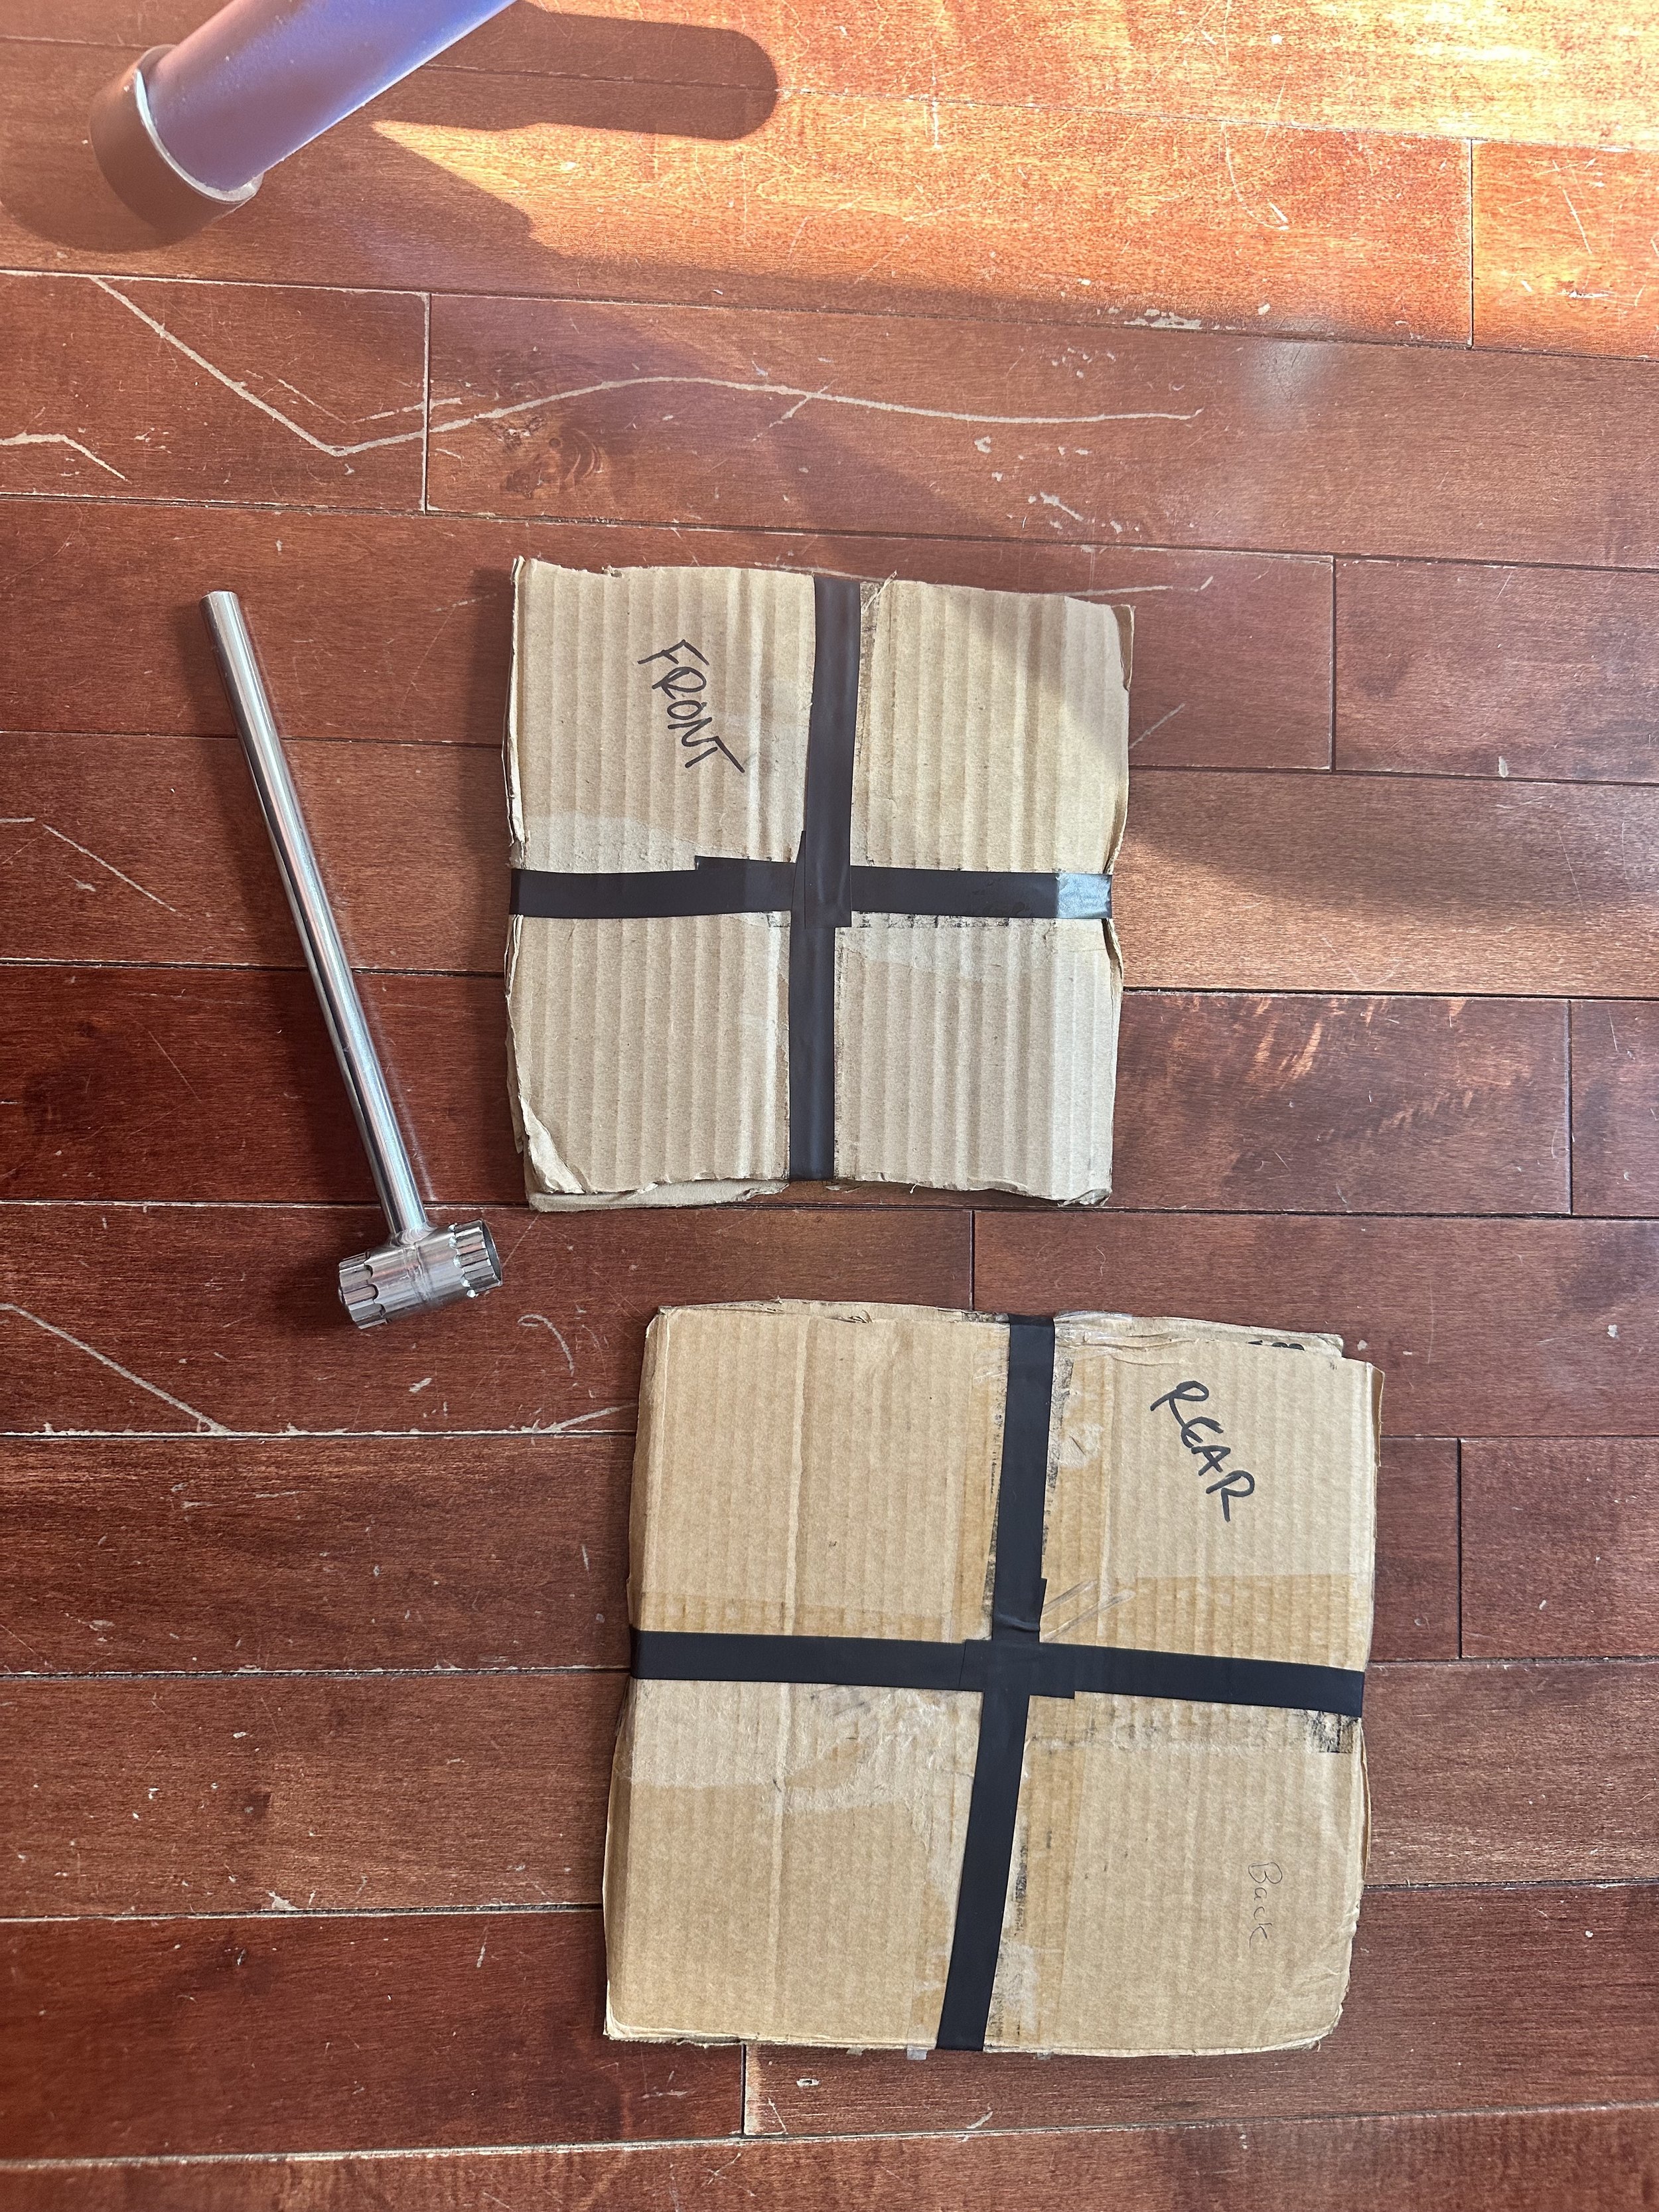
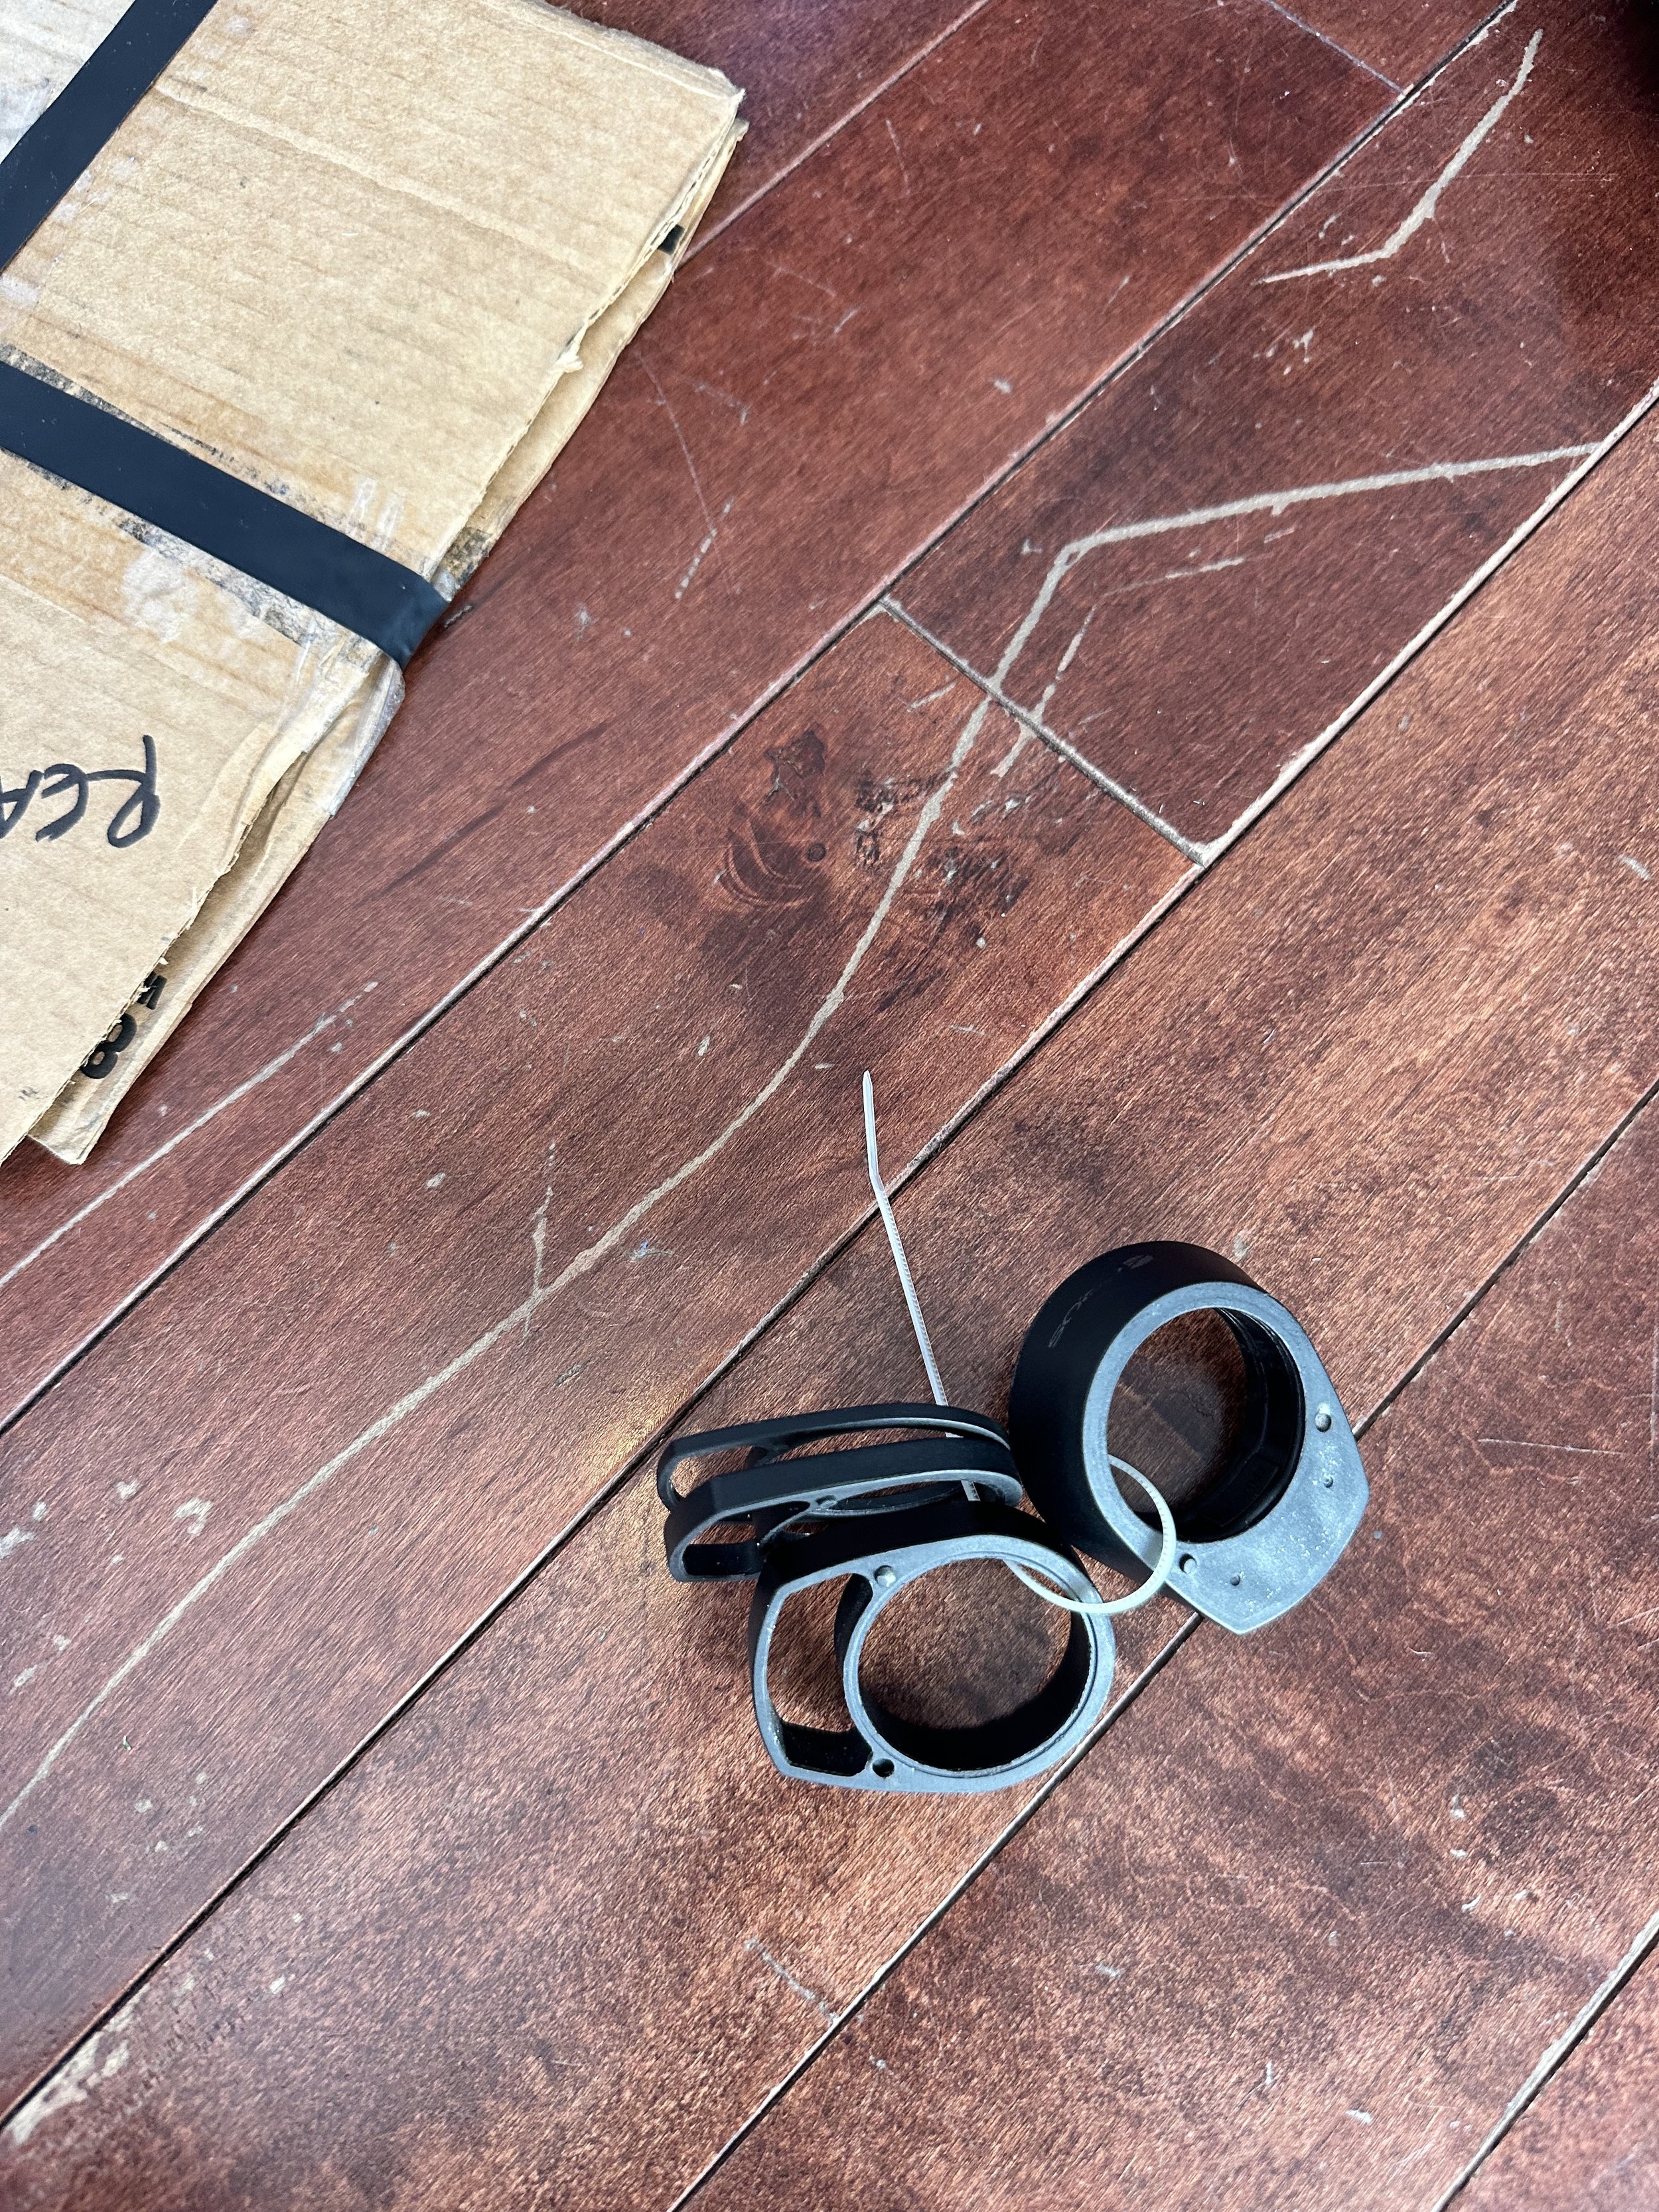
2. If you have disc brakes, remove the rotors and put them between two pieces of cardboard for protection. Make sure you label which one is the front brake and which is the rear if they are the same size. This step can be super annoying if you have six-bolt rotors like I do, but I’d rather take a few extra minutes during the packing step than deal with brake rub and rotor realignment when I’m trying to put my bike together later.
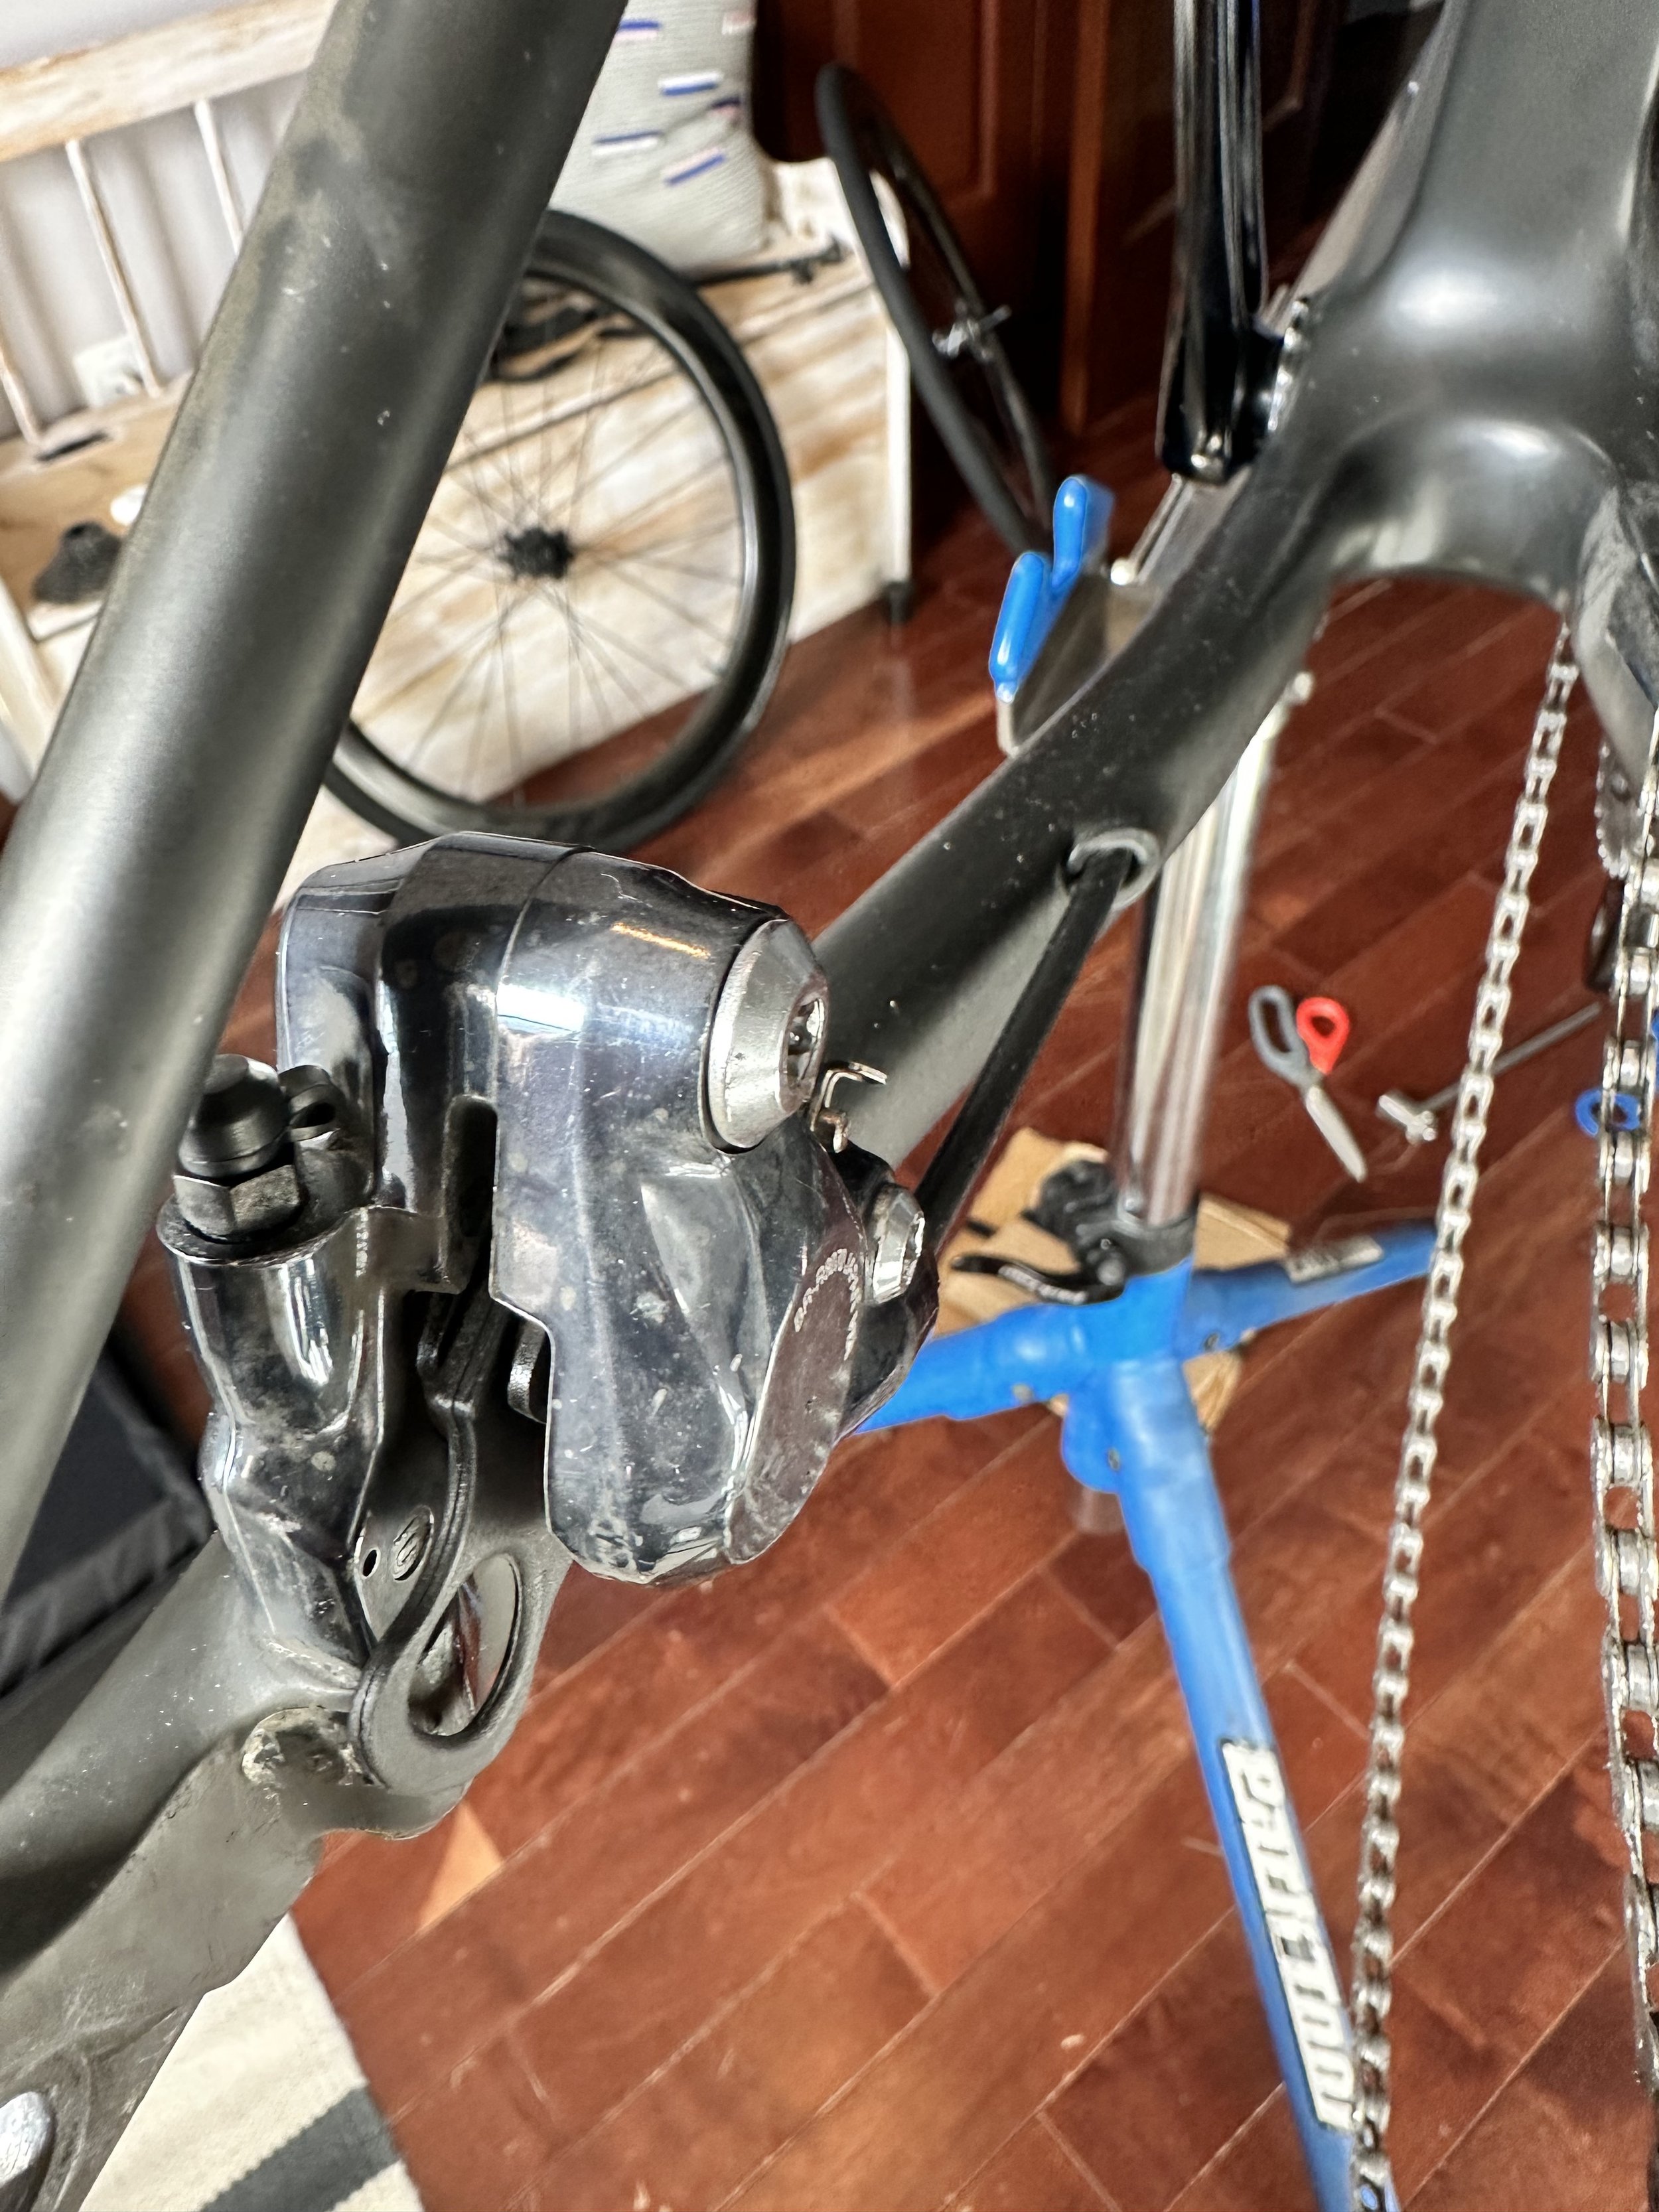
3. Put plastic brake stops in your brake calipers. (If you don’t have plastic brake stops, ask your LBS for a couple or just use a bit of cardboard). This will prevent the very frustrating experience of pushing out brake pads that have been squeezed during transit and/or leaking hydraulic fluid all over your bag.
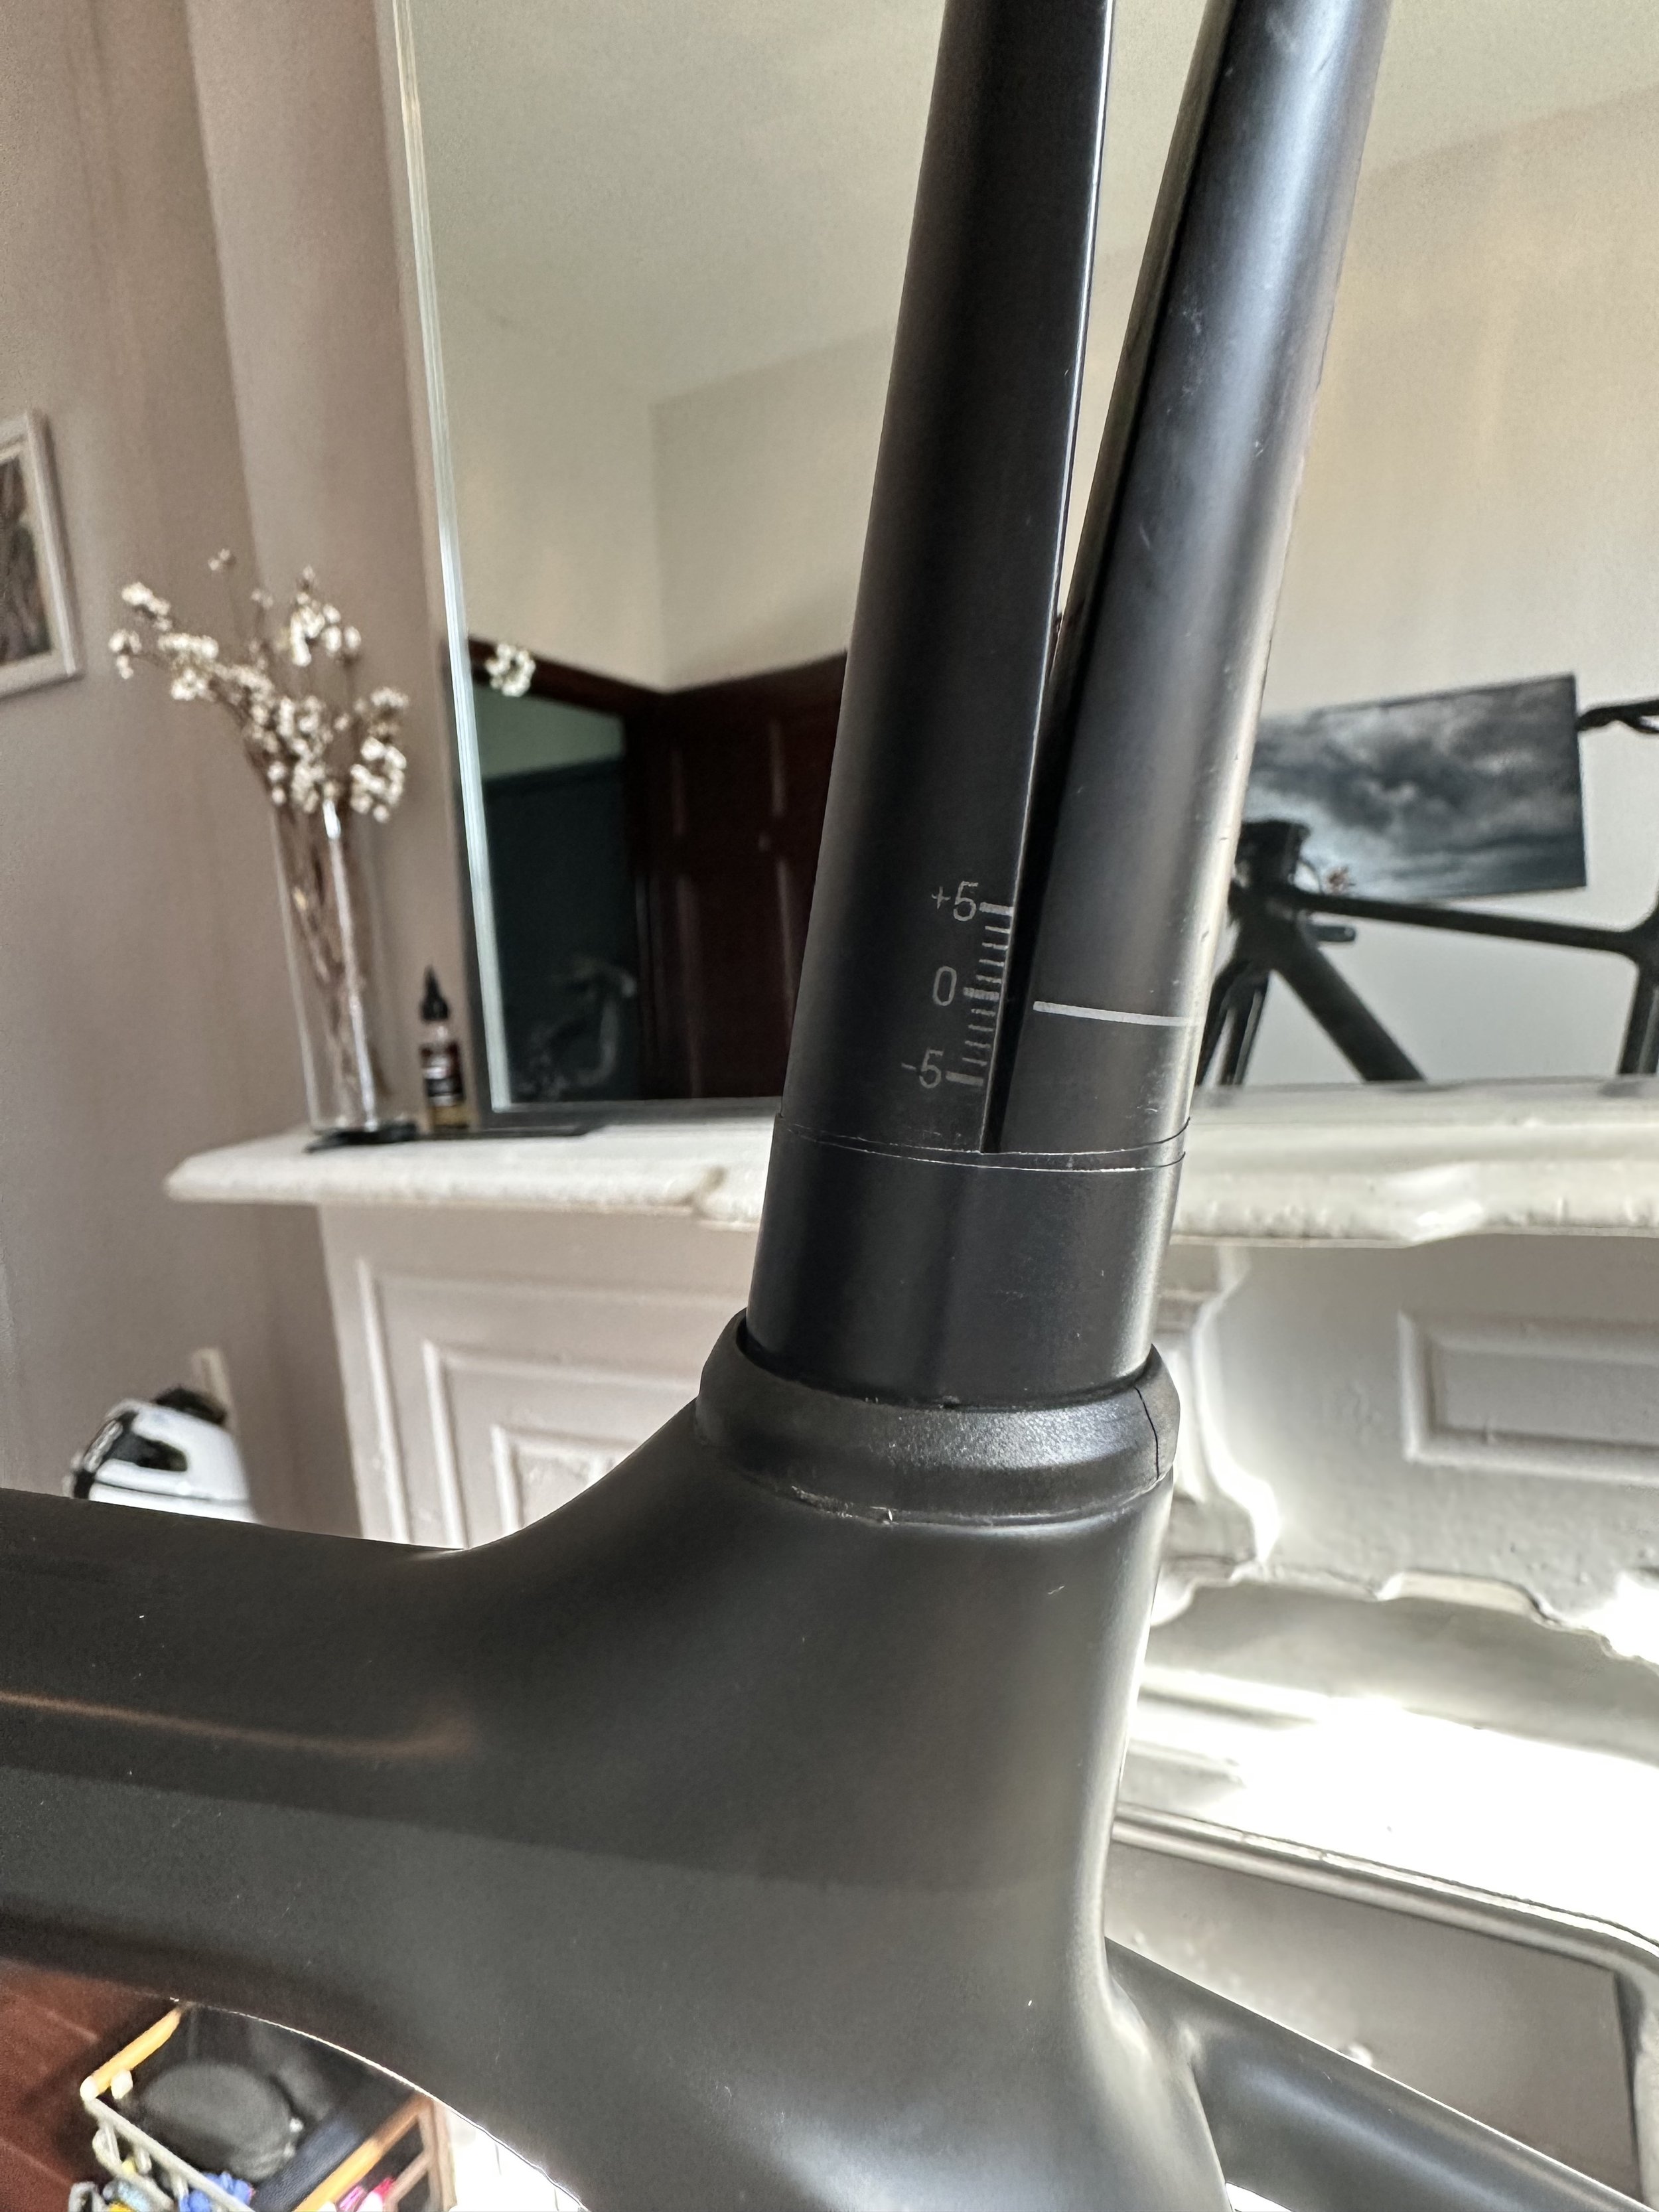
4. Mark your seatpost height with a piece of electrical tape and then remove the seatpost. Add any screws/bolts to your ziplock bag of little metal bits. If your di2 battery is in your seatpost, disconnect the wires and be sure to tape them to the outside of the frame so you don’t have a fishing expedition later.
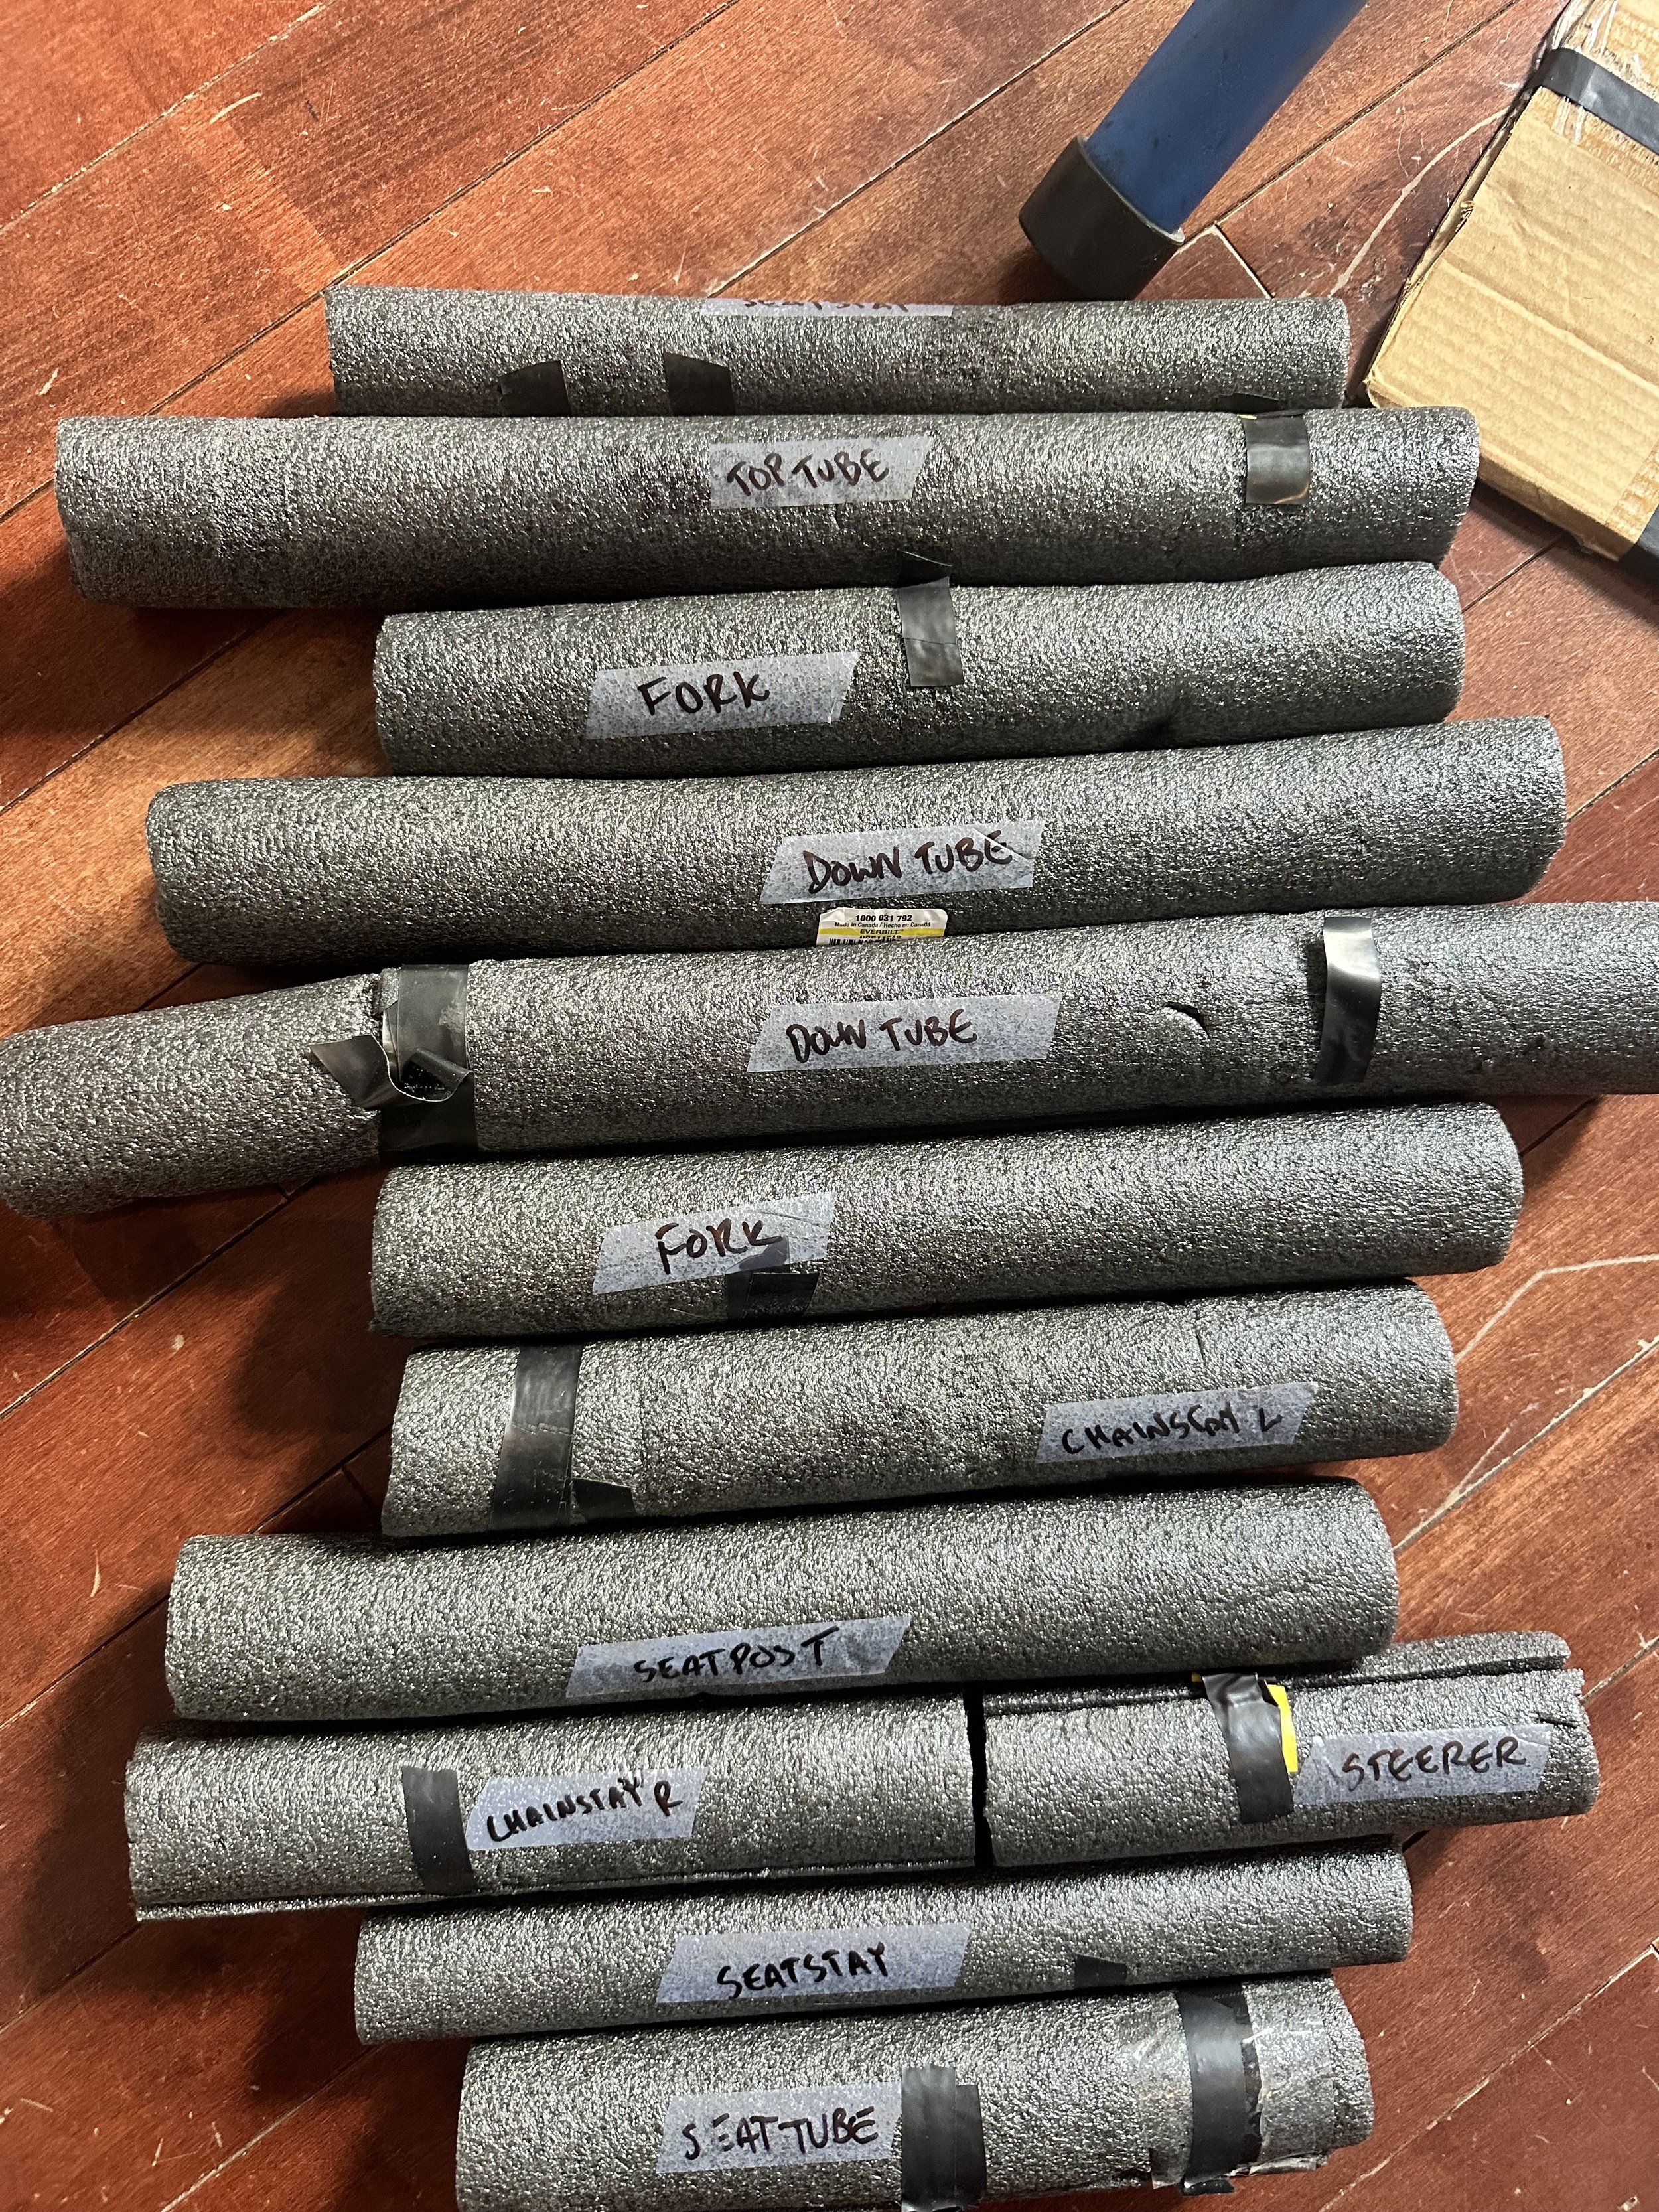
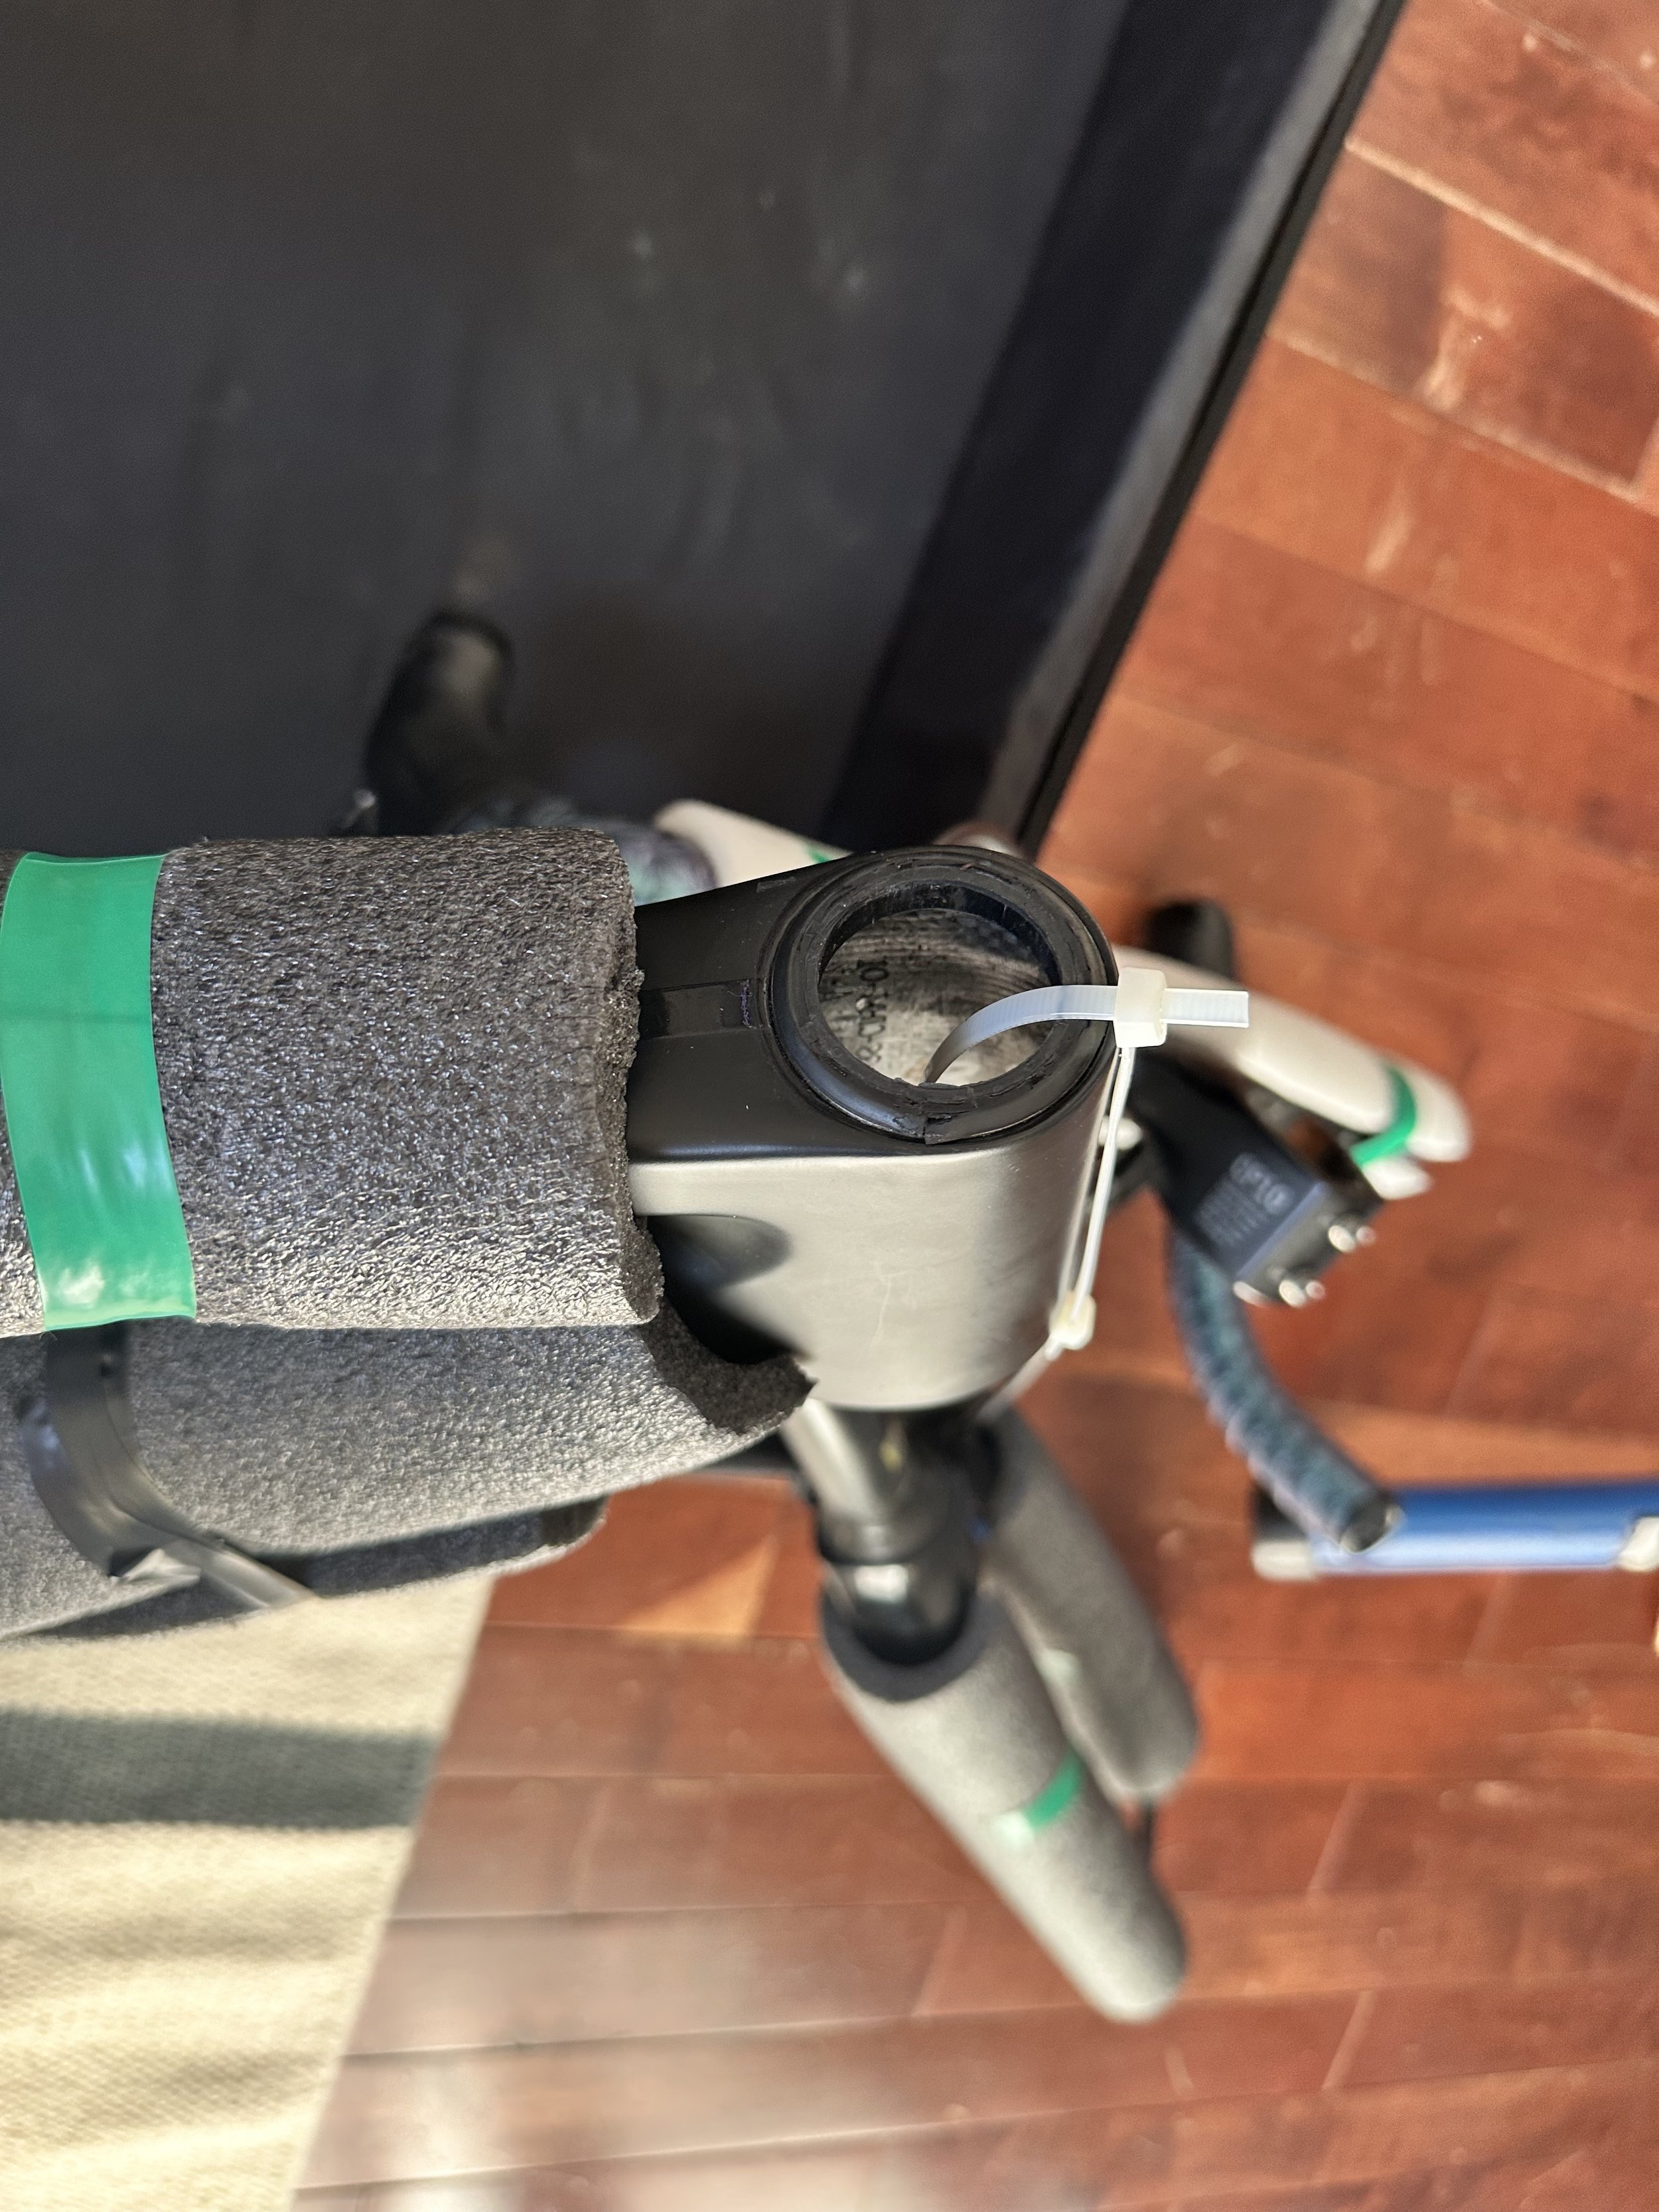
5. Protect your frame with something: bubble wrap, a frame protection kit, or my personal preference — foam pipe insulation. You can pick it up at any hardware store for a couple dollars and it’ll last for at least 5-10 bike trips. I like to label the pieces with the corresponding part of the frame for super quick assembly.
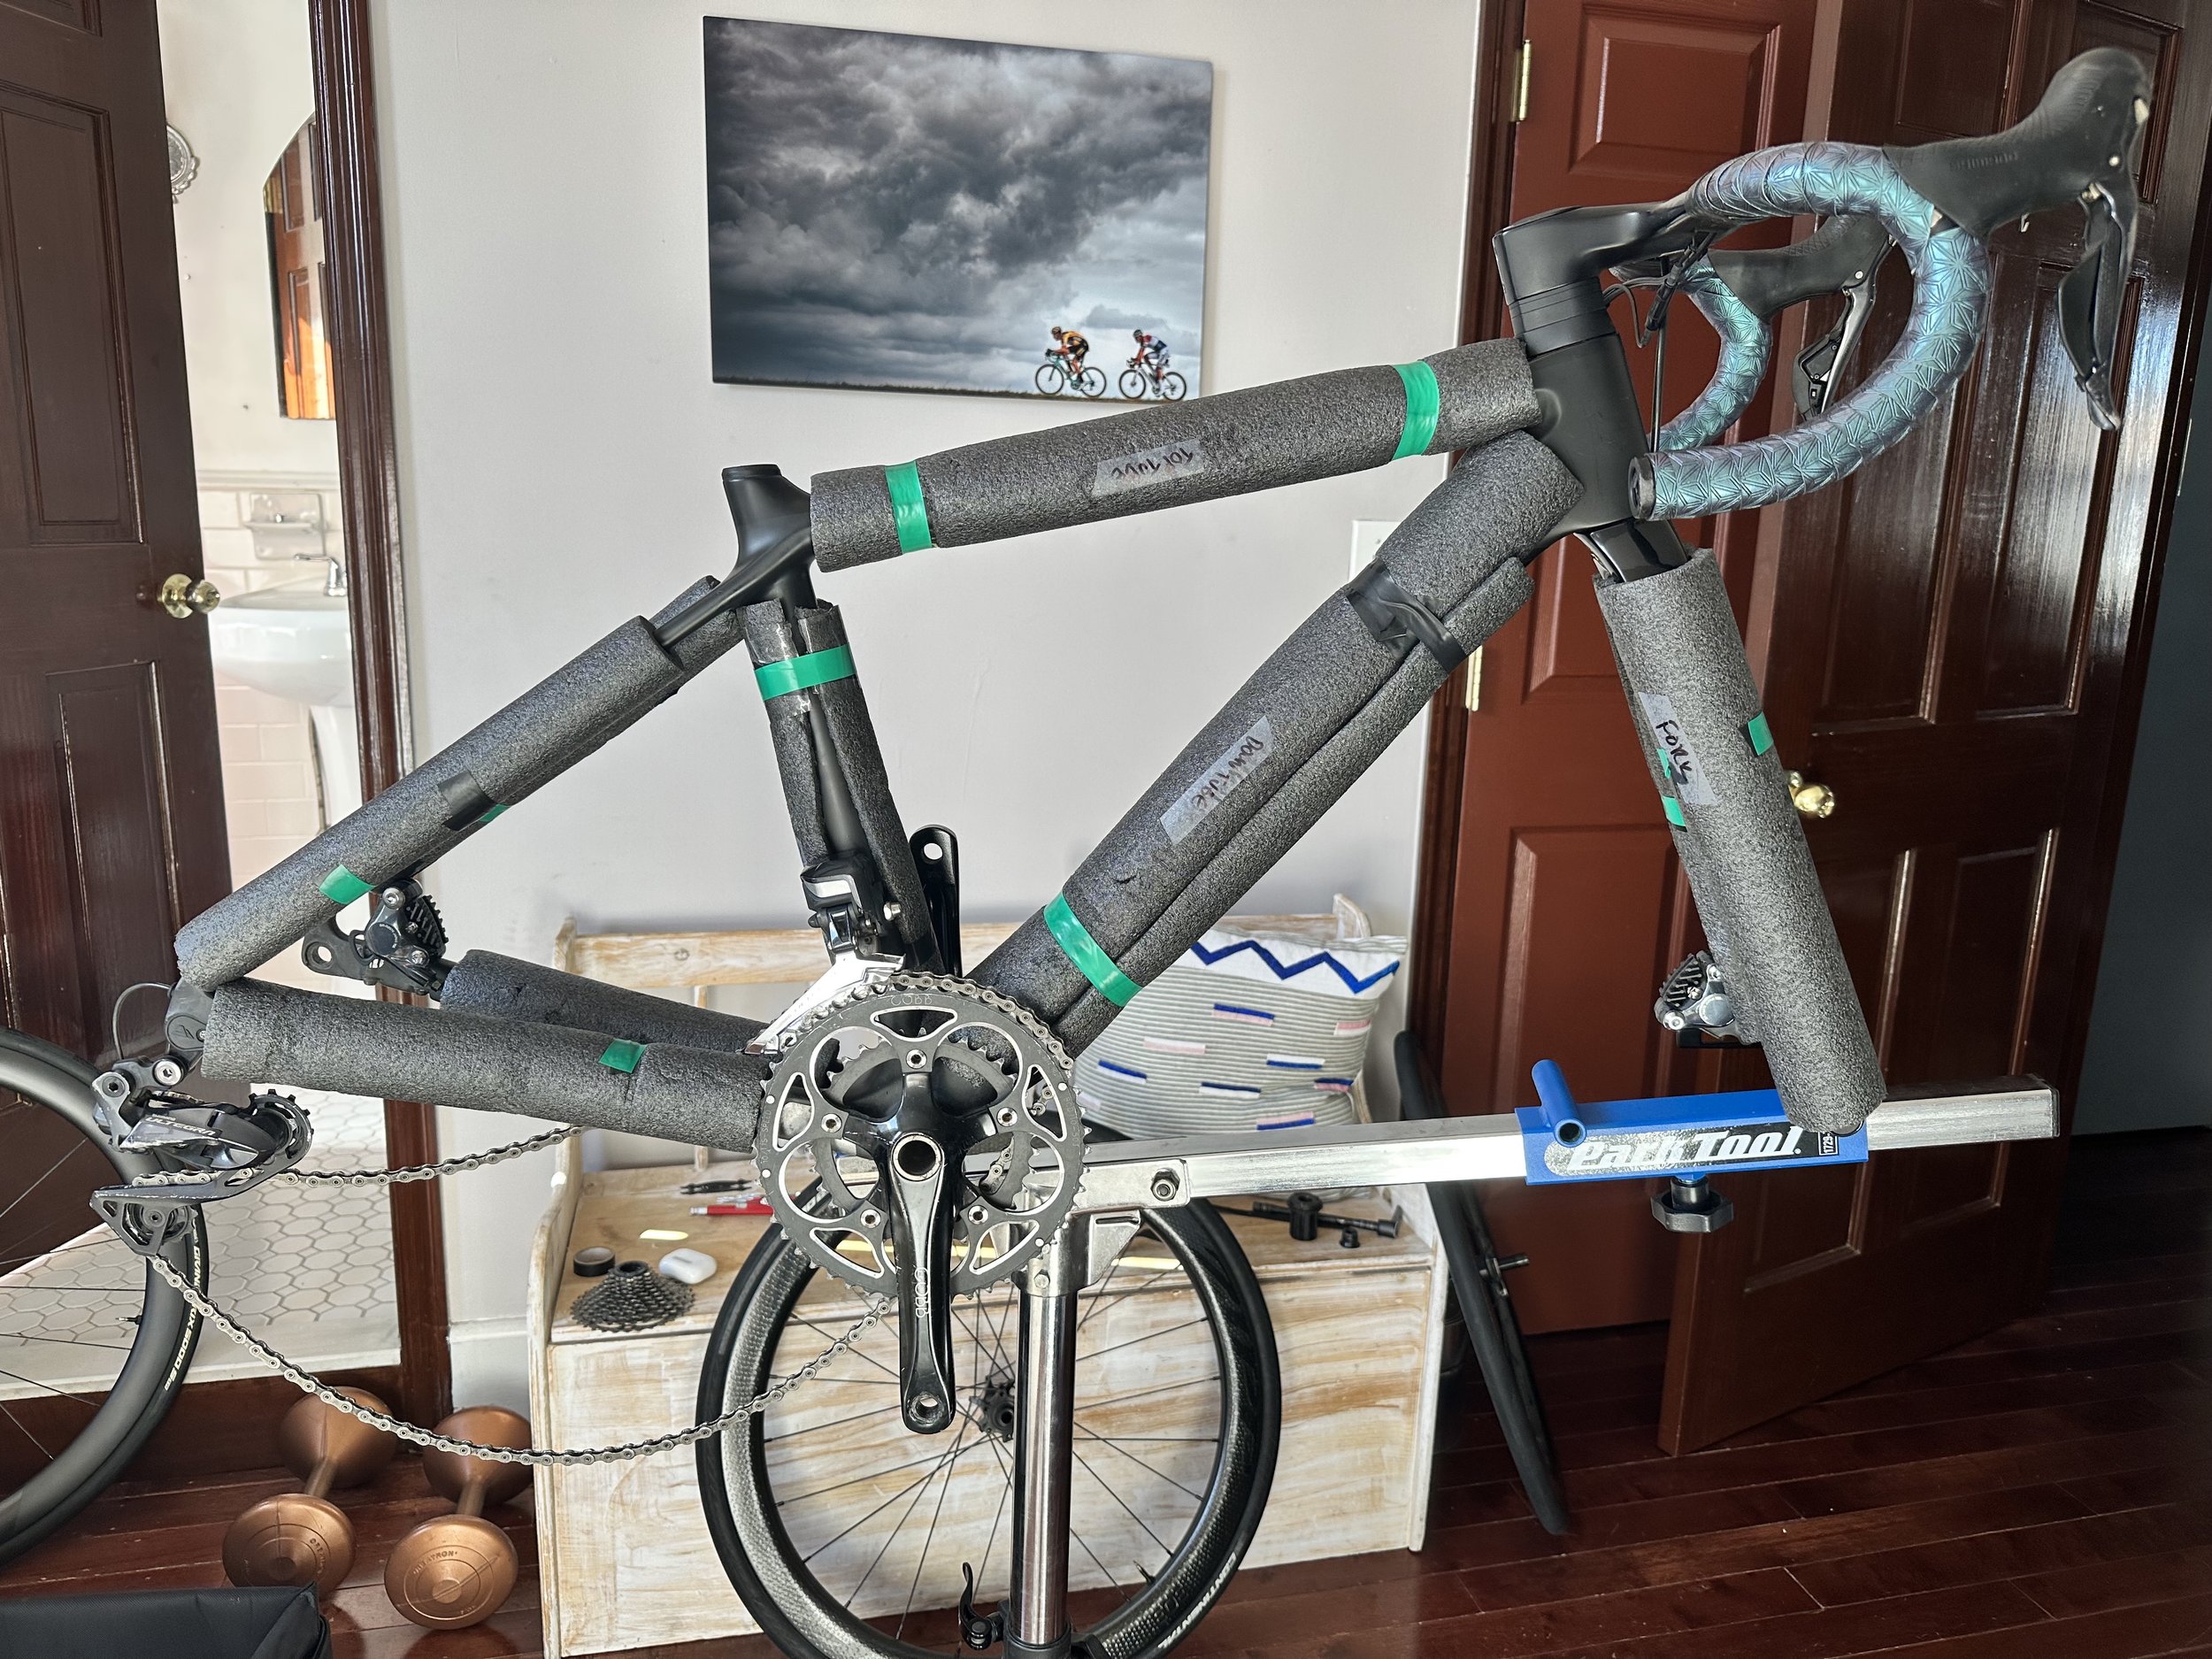
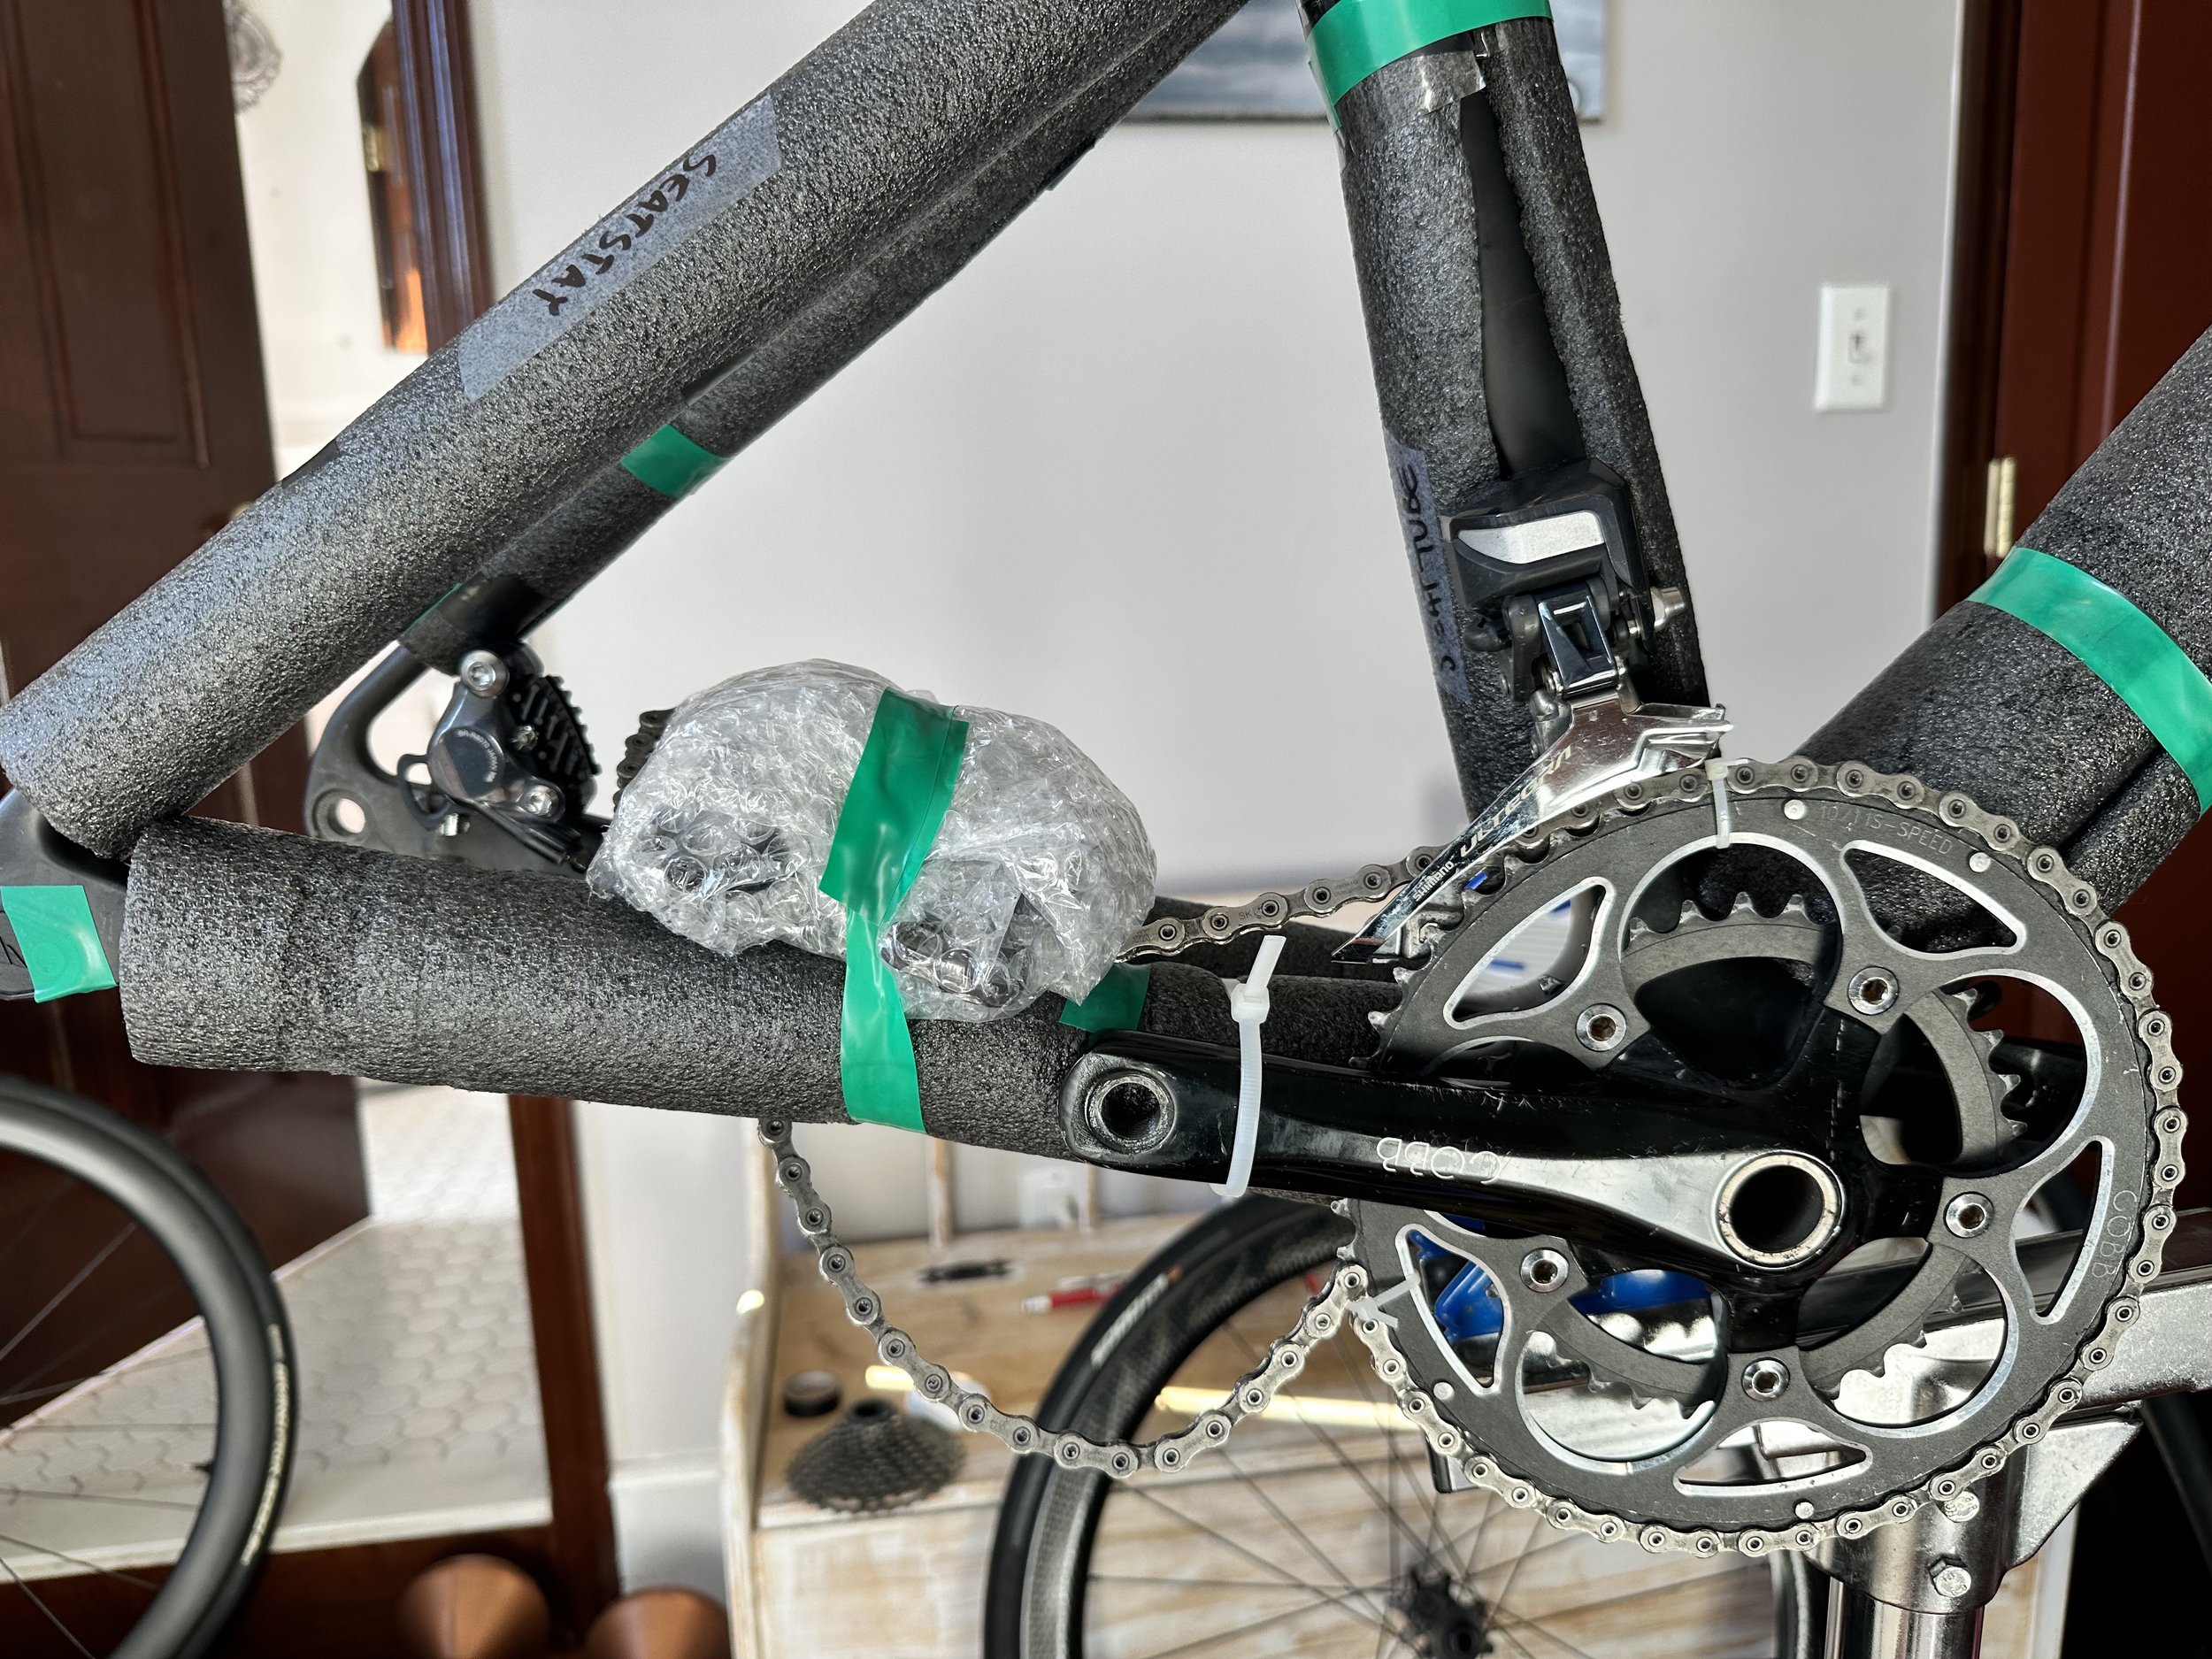
6. Shift into the largest chainring and the smallest cog. If you have Di2, disconnect the wire from the rear derailleur. Unscrew the derailleur hanger from the frame and put a little piece of electrical tape over the derailleur hanger screw. I prefer to do this as opposed to removing the derailleur from the hanger since this prevents the hanger from bending during transit.
7. Wrap the rear derailleur in bubble wrap and secure it to the frame with bubble wrap.
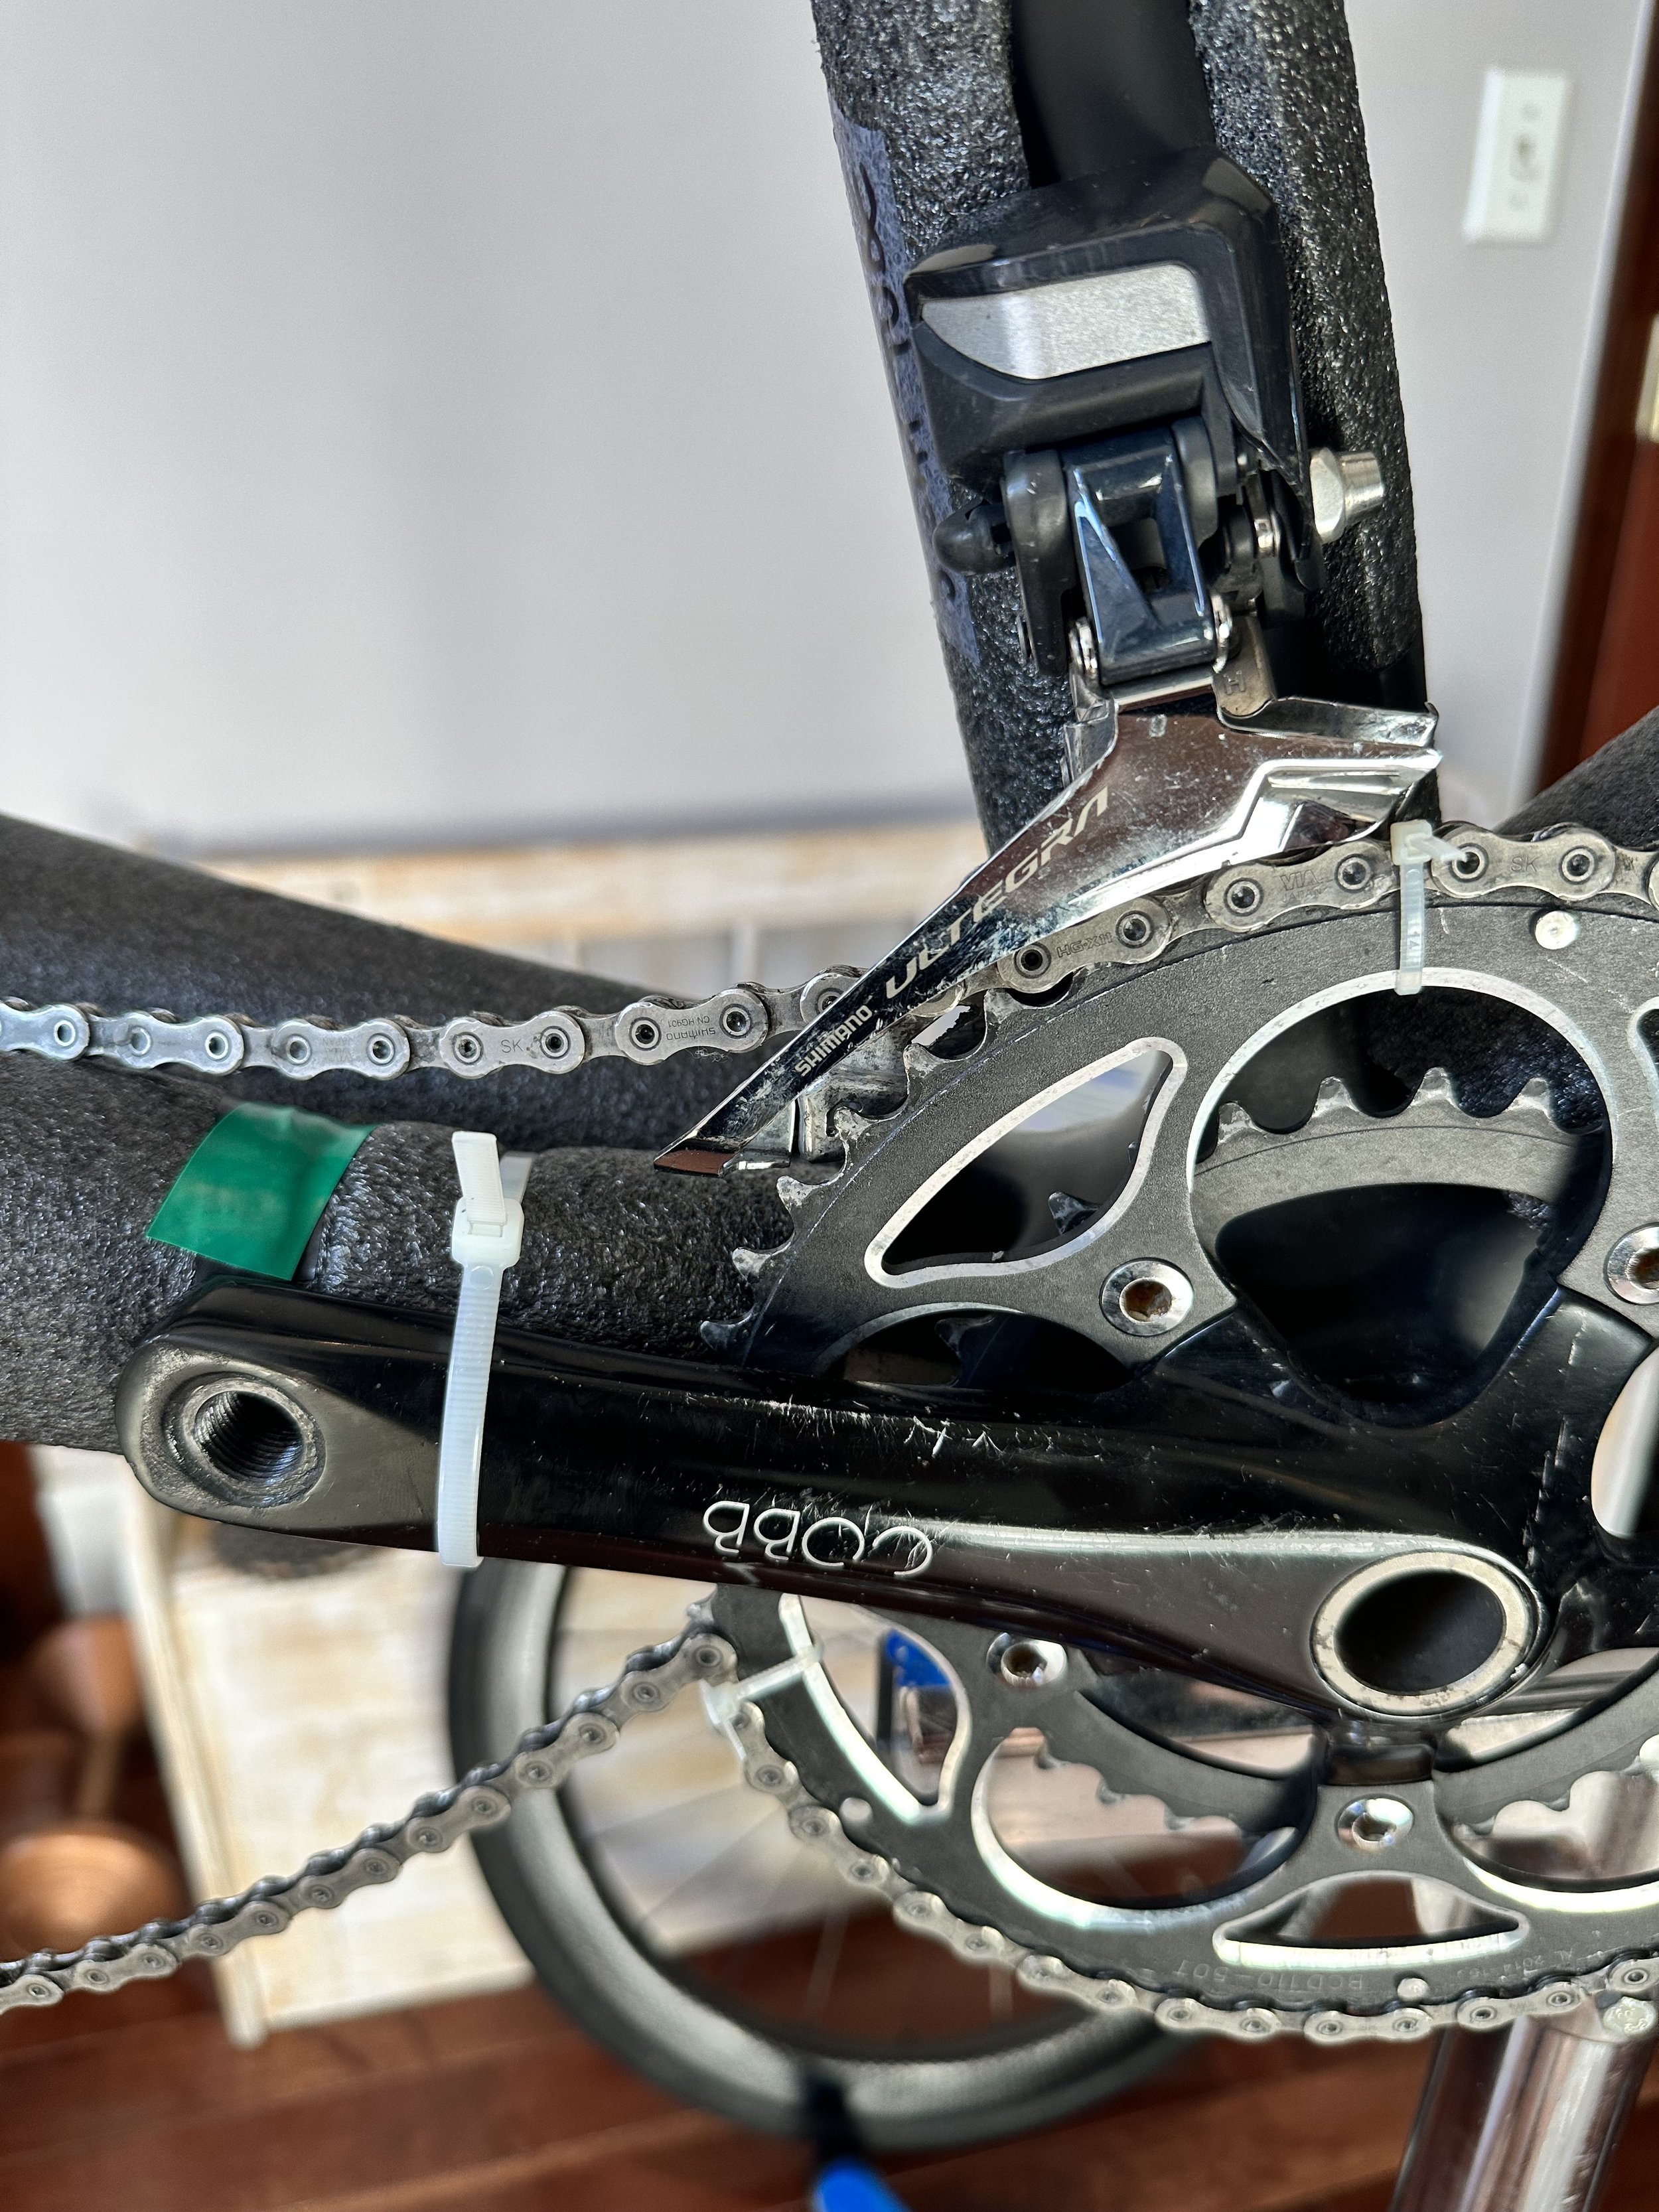
8. Zip tie the crank arm to the chainstay. I also like to zip tie the chain to the big chainring but I’ll admit this might be overkill. I have a waxed chain (thank you Yosef) so it’s fairly clean, but if you don’t, you may want to bubble wrap your chain and chainring to prevent grease from getting all over the inside of your bike bag.

9. Take off the top cap and put it in the baggie of metal bits and bobs.
10. Remove the handlebars and spacers. Zip tie the spacers together and add them to the bag. If you have any random little pieces free floating around (like my Canyon does) don’t lose these!!! And don’t forget to take pictures so you remember how everything fits together.
11. Remove the fork. Don’t remove any of the bearings — just put a zip tie around the whole headset to keep them in place.
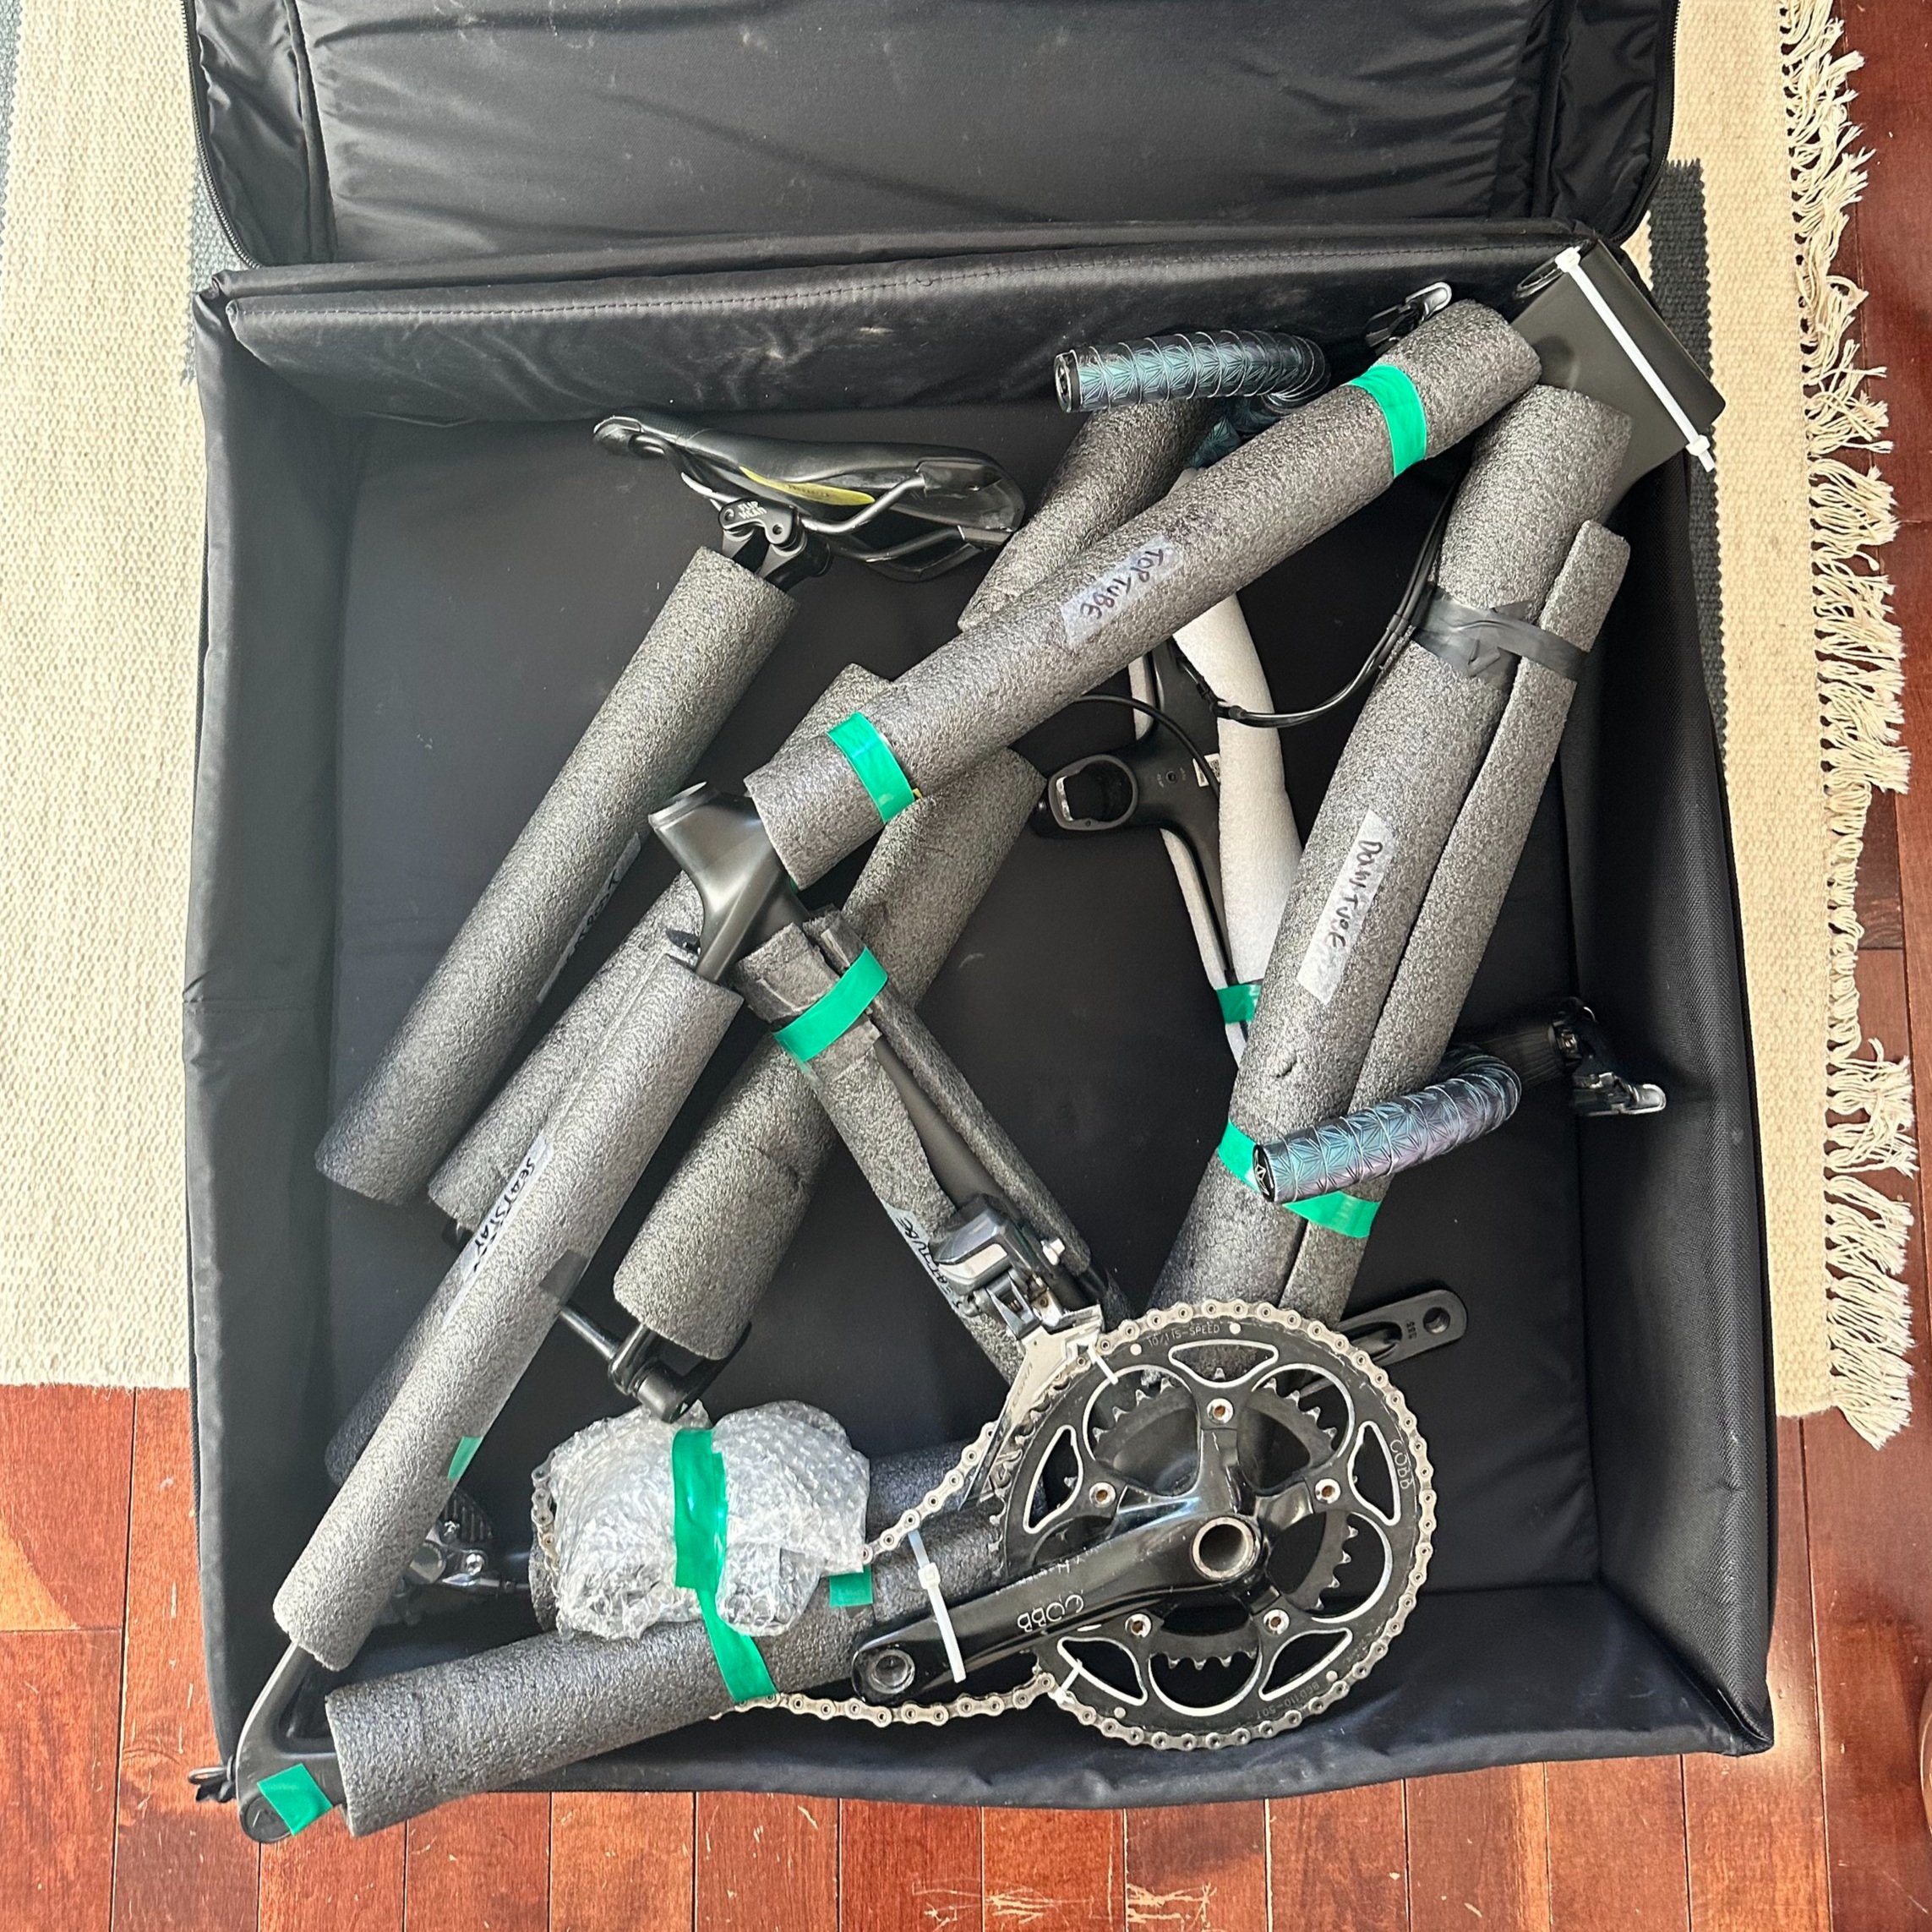
12. Put the wheels and frame into the bike bag. (For this particular bag, the front wheel goes in a padded compartment under the frame and the rear wheel goes in a padded compartment on top once the frame is in.) This part is kinda Tetris-y and will depend on your frame geometry so find something that works and then take pictures/video so you remember for next time.
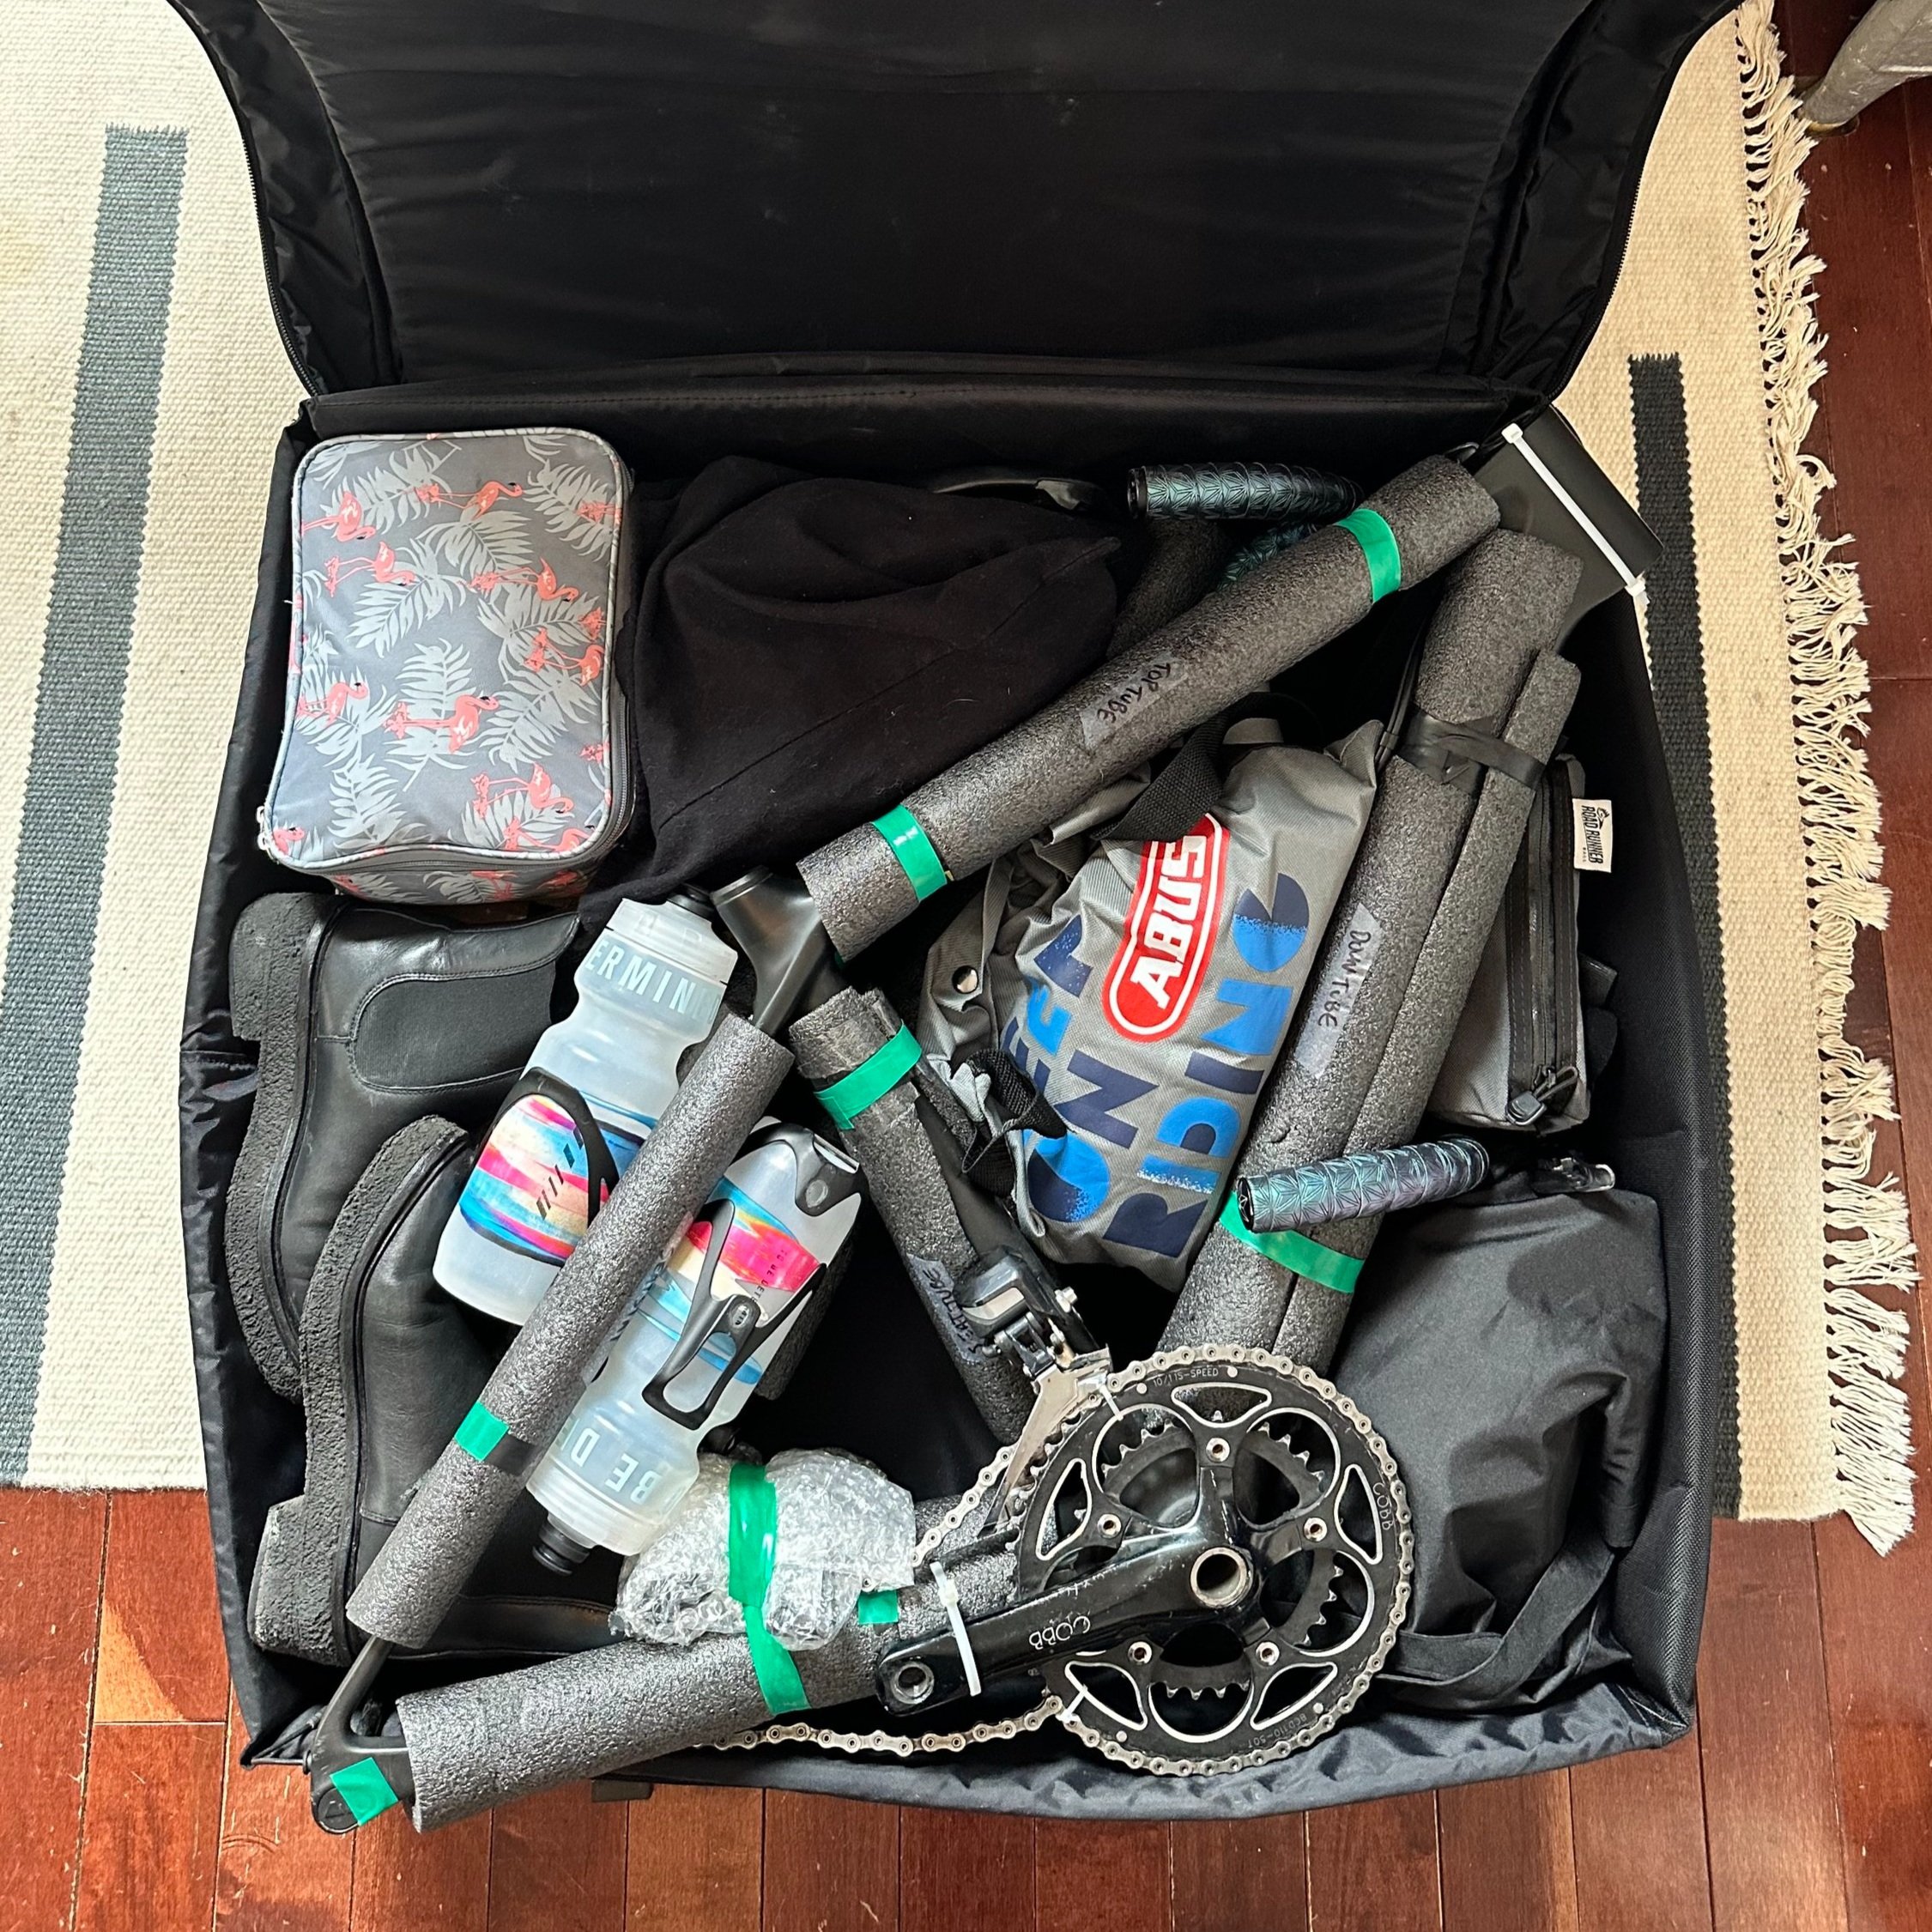
13. I like to put my bike shoes, helmet and at least one kit in my carry-on so that I can rent a bike and still ride if my bag is delayed or lost, but anything else can go in the bike bag: a musette bag full of gels and bars, a bag with allen keys, a torque wrench, pump, chargers, etc, extra shoes, bar bag.
14. Don’t forget your AirTag (or Tile)!
As you can see below, the bag packs up nice and small — not that much taller than my carry-on. Because the bag itself is so light it’s rarely over the 50lb limit even with all the tools and snacks and other random bits I’ve thrown in there. I do sometimes wish that this bag had wheels but apart from that, it’s honestly not too difficult to pack and unpack my bike!
