How to take better pictures of your bike
As a devoted lurker in r/bikeporn, I love to see what makes up other cyclist’s dream builds. However I have noticed a big variation in the quality of the photographs shared there. This got me thinking, whilst I am not an expert, I usually have the pleasure of shooting new builds of tbd and wanted to share some tips I have learned along the way.
Location
Pick your spot - If this is a new build find a complimentary background or a plain wall to make sure your bike is the main subject. If you want to show off where you and your bike are, the world is your oyster just make sure the bike is level (see below)
Consider the lighting - Natural light is always best, aim for sunrise or sunset when the light is at its “softest”. Midday sun can cause harsh shadows which won’t do your build any justice
Set up the bike
To make the bike look as fast and clean as possible set up the bike with the following in mind
Make sure the bike is level - this goes for BAAWs (bike against a wall), where you have a magic stick or if a friend is ghost holding the bike (I’ve stopped doing this since bikes have gotten so damn expensive)
Valves at 6 or 12 o’clock - for me this depends on the label of the tire and what I want to show. Another tip please line up the tire label and the stem for that pro look
Driveside out, always - you have to show off your groupset
Crank - get the crank nice and level with the arms at 3 and 9 o’clock
Big ring - show off that big 54t chainring
Smallest gear - put the bike in the smallest cog (the 10 or 11) out the back. My exception for this rule is cyclocross bikes or MTBs where you want to show off that impressive gear range
Make sure your bike is clean - dirt and grime really show up on those detail shots. Have you considered waxing your chain?
Take off the accessories - no lights or saddle bags. Computers are fine, bidons too, but only if they match
Taking the shot
So now your checklist is checked, let’s take the shot. Here are some tips to make the bike really pop
Depth of field - Shoot with a shallow depth of field (I usually aim for f2.8). This will isolate your bike and will show it off like the star it is. If you aren’t using a “proper” camera, portrait mode on the iPhone can do this, but check the photo, sometimes it doesn’t get the blur right and you could be missing spokes
Get low - This is my favourite trick, get nice and low. In your viewfinder you can line up the handlebar drops so you can only see the drop closest to you. This keeps the cockpit looking very sleek
Get the whole bike - Make sure the whole bike is in the frame. Try and have even space around the bike but it doesn’t have to be perfect, you can crop it later in lightroom or similar
Show off the details - your bike has a bunch of fun component choices, make sure you show them off! I like to get close up shots of the derailleurs, brakes, chain rings, fun graphics, saddles, cockpit and the welds (if ti/steel/alloy)
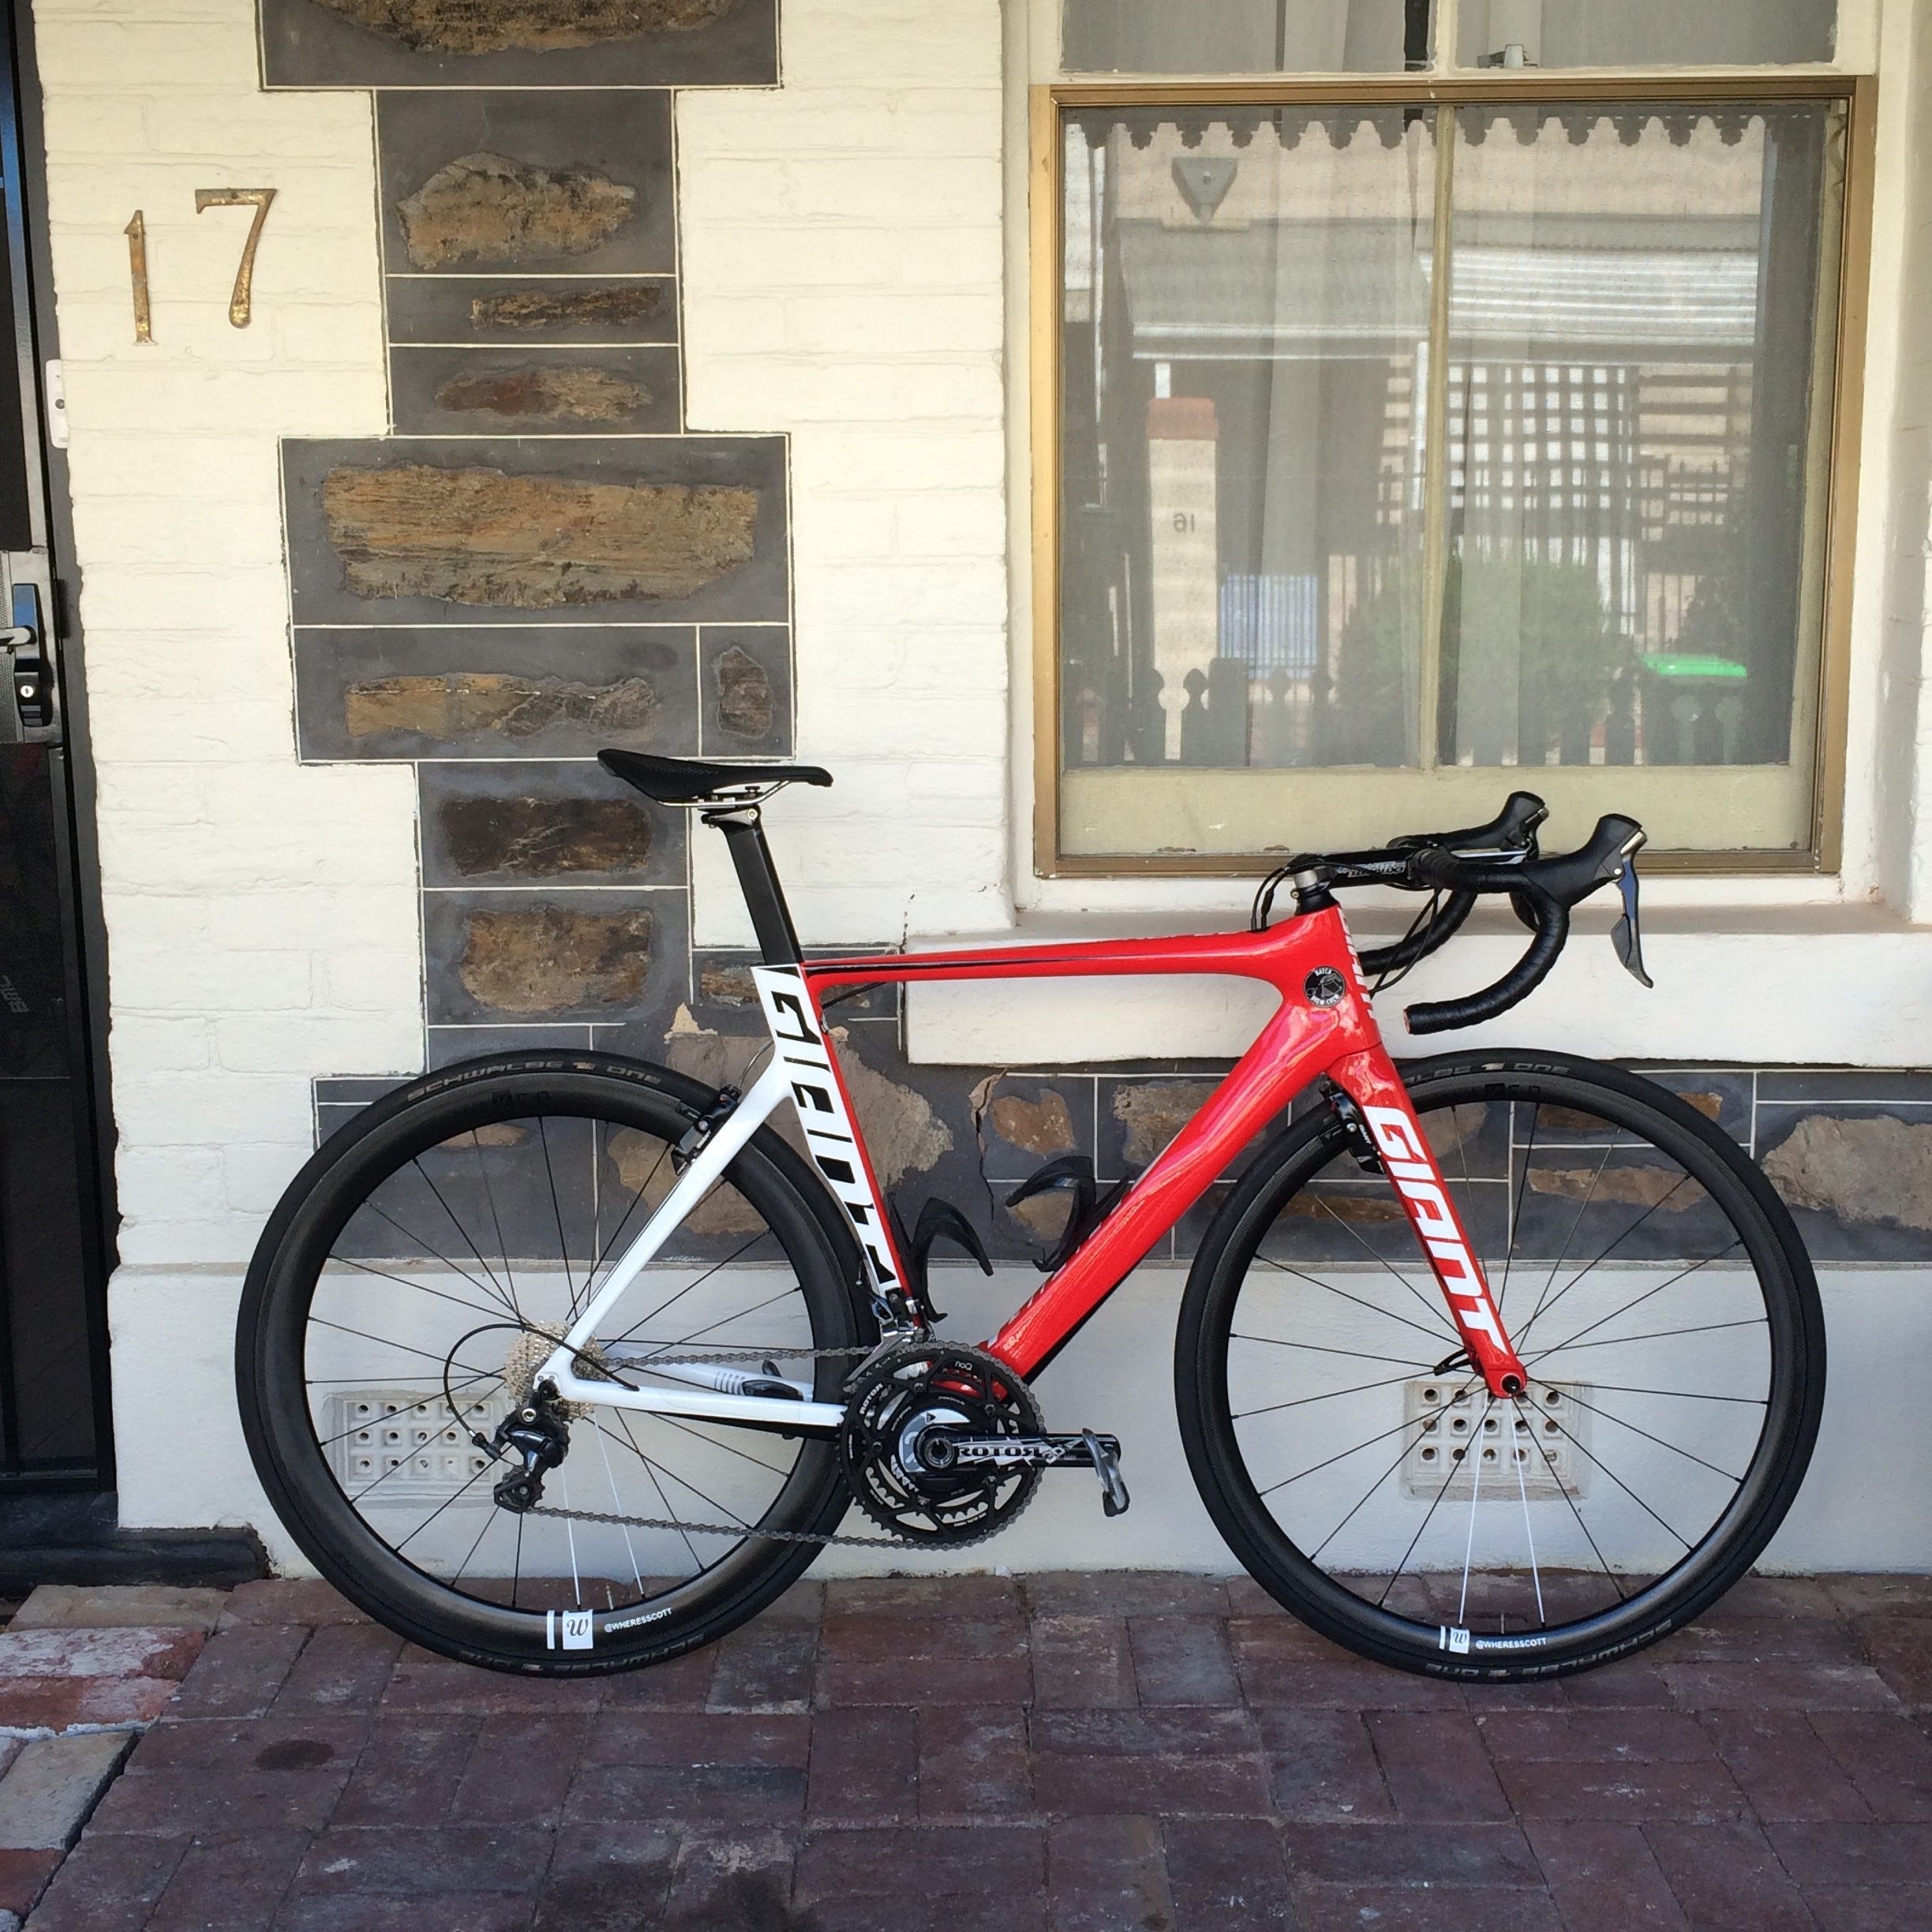
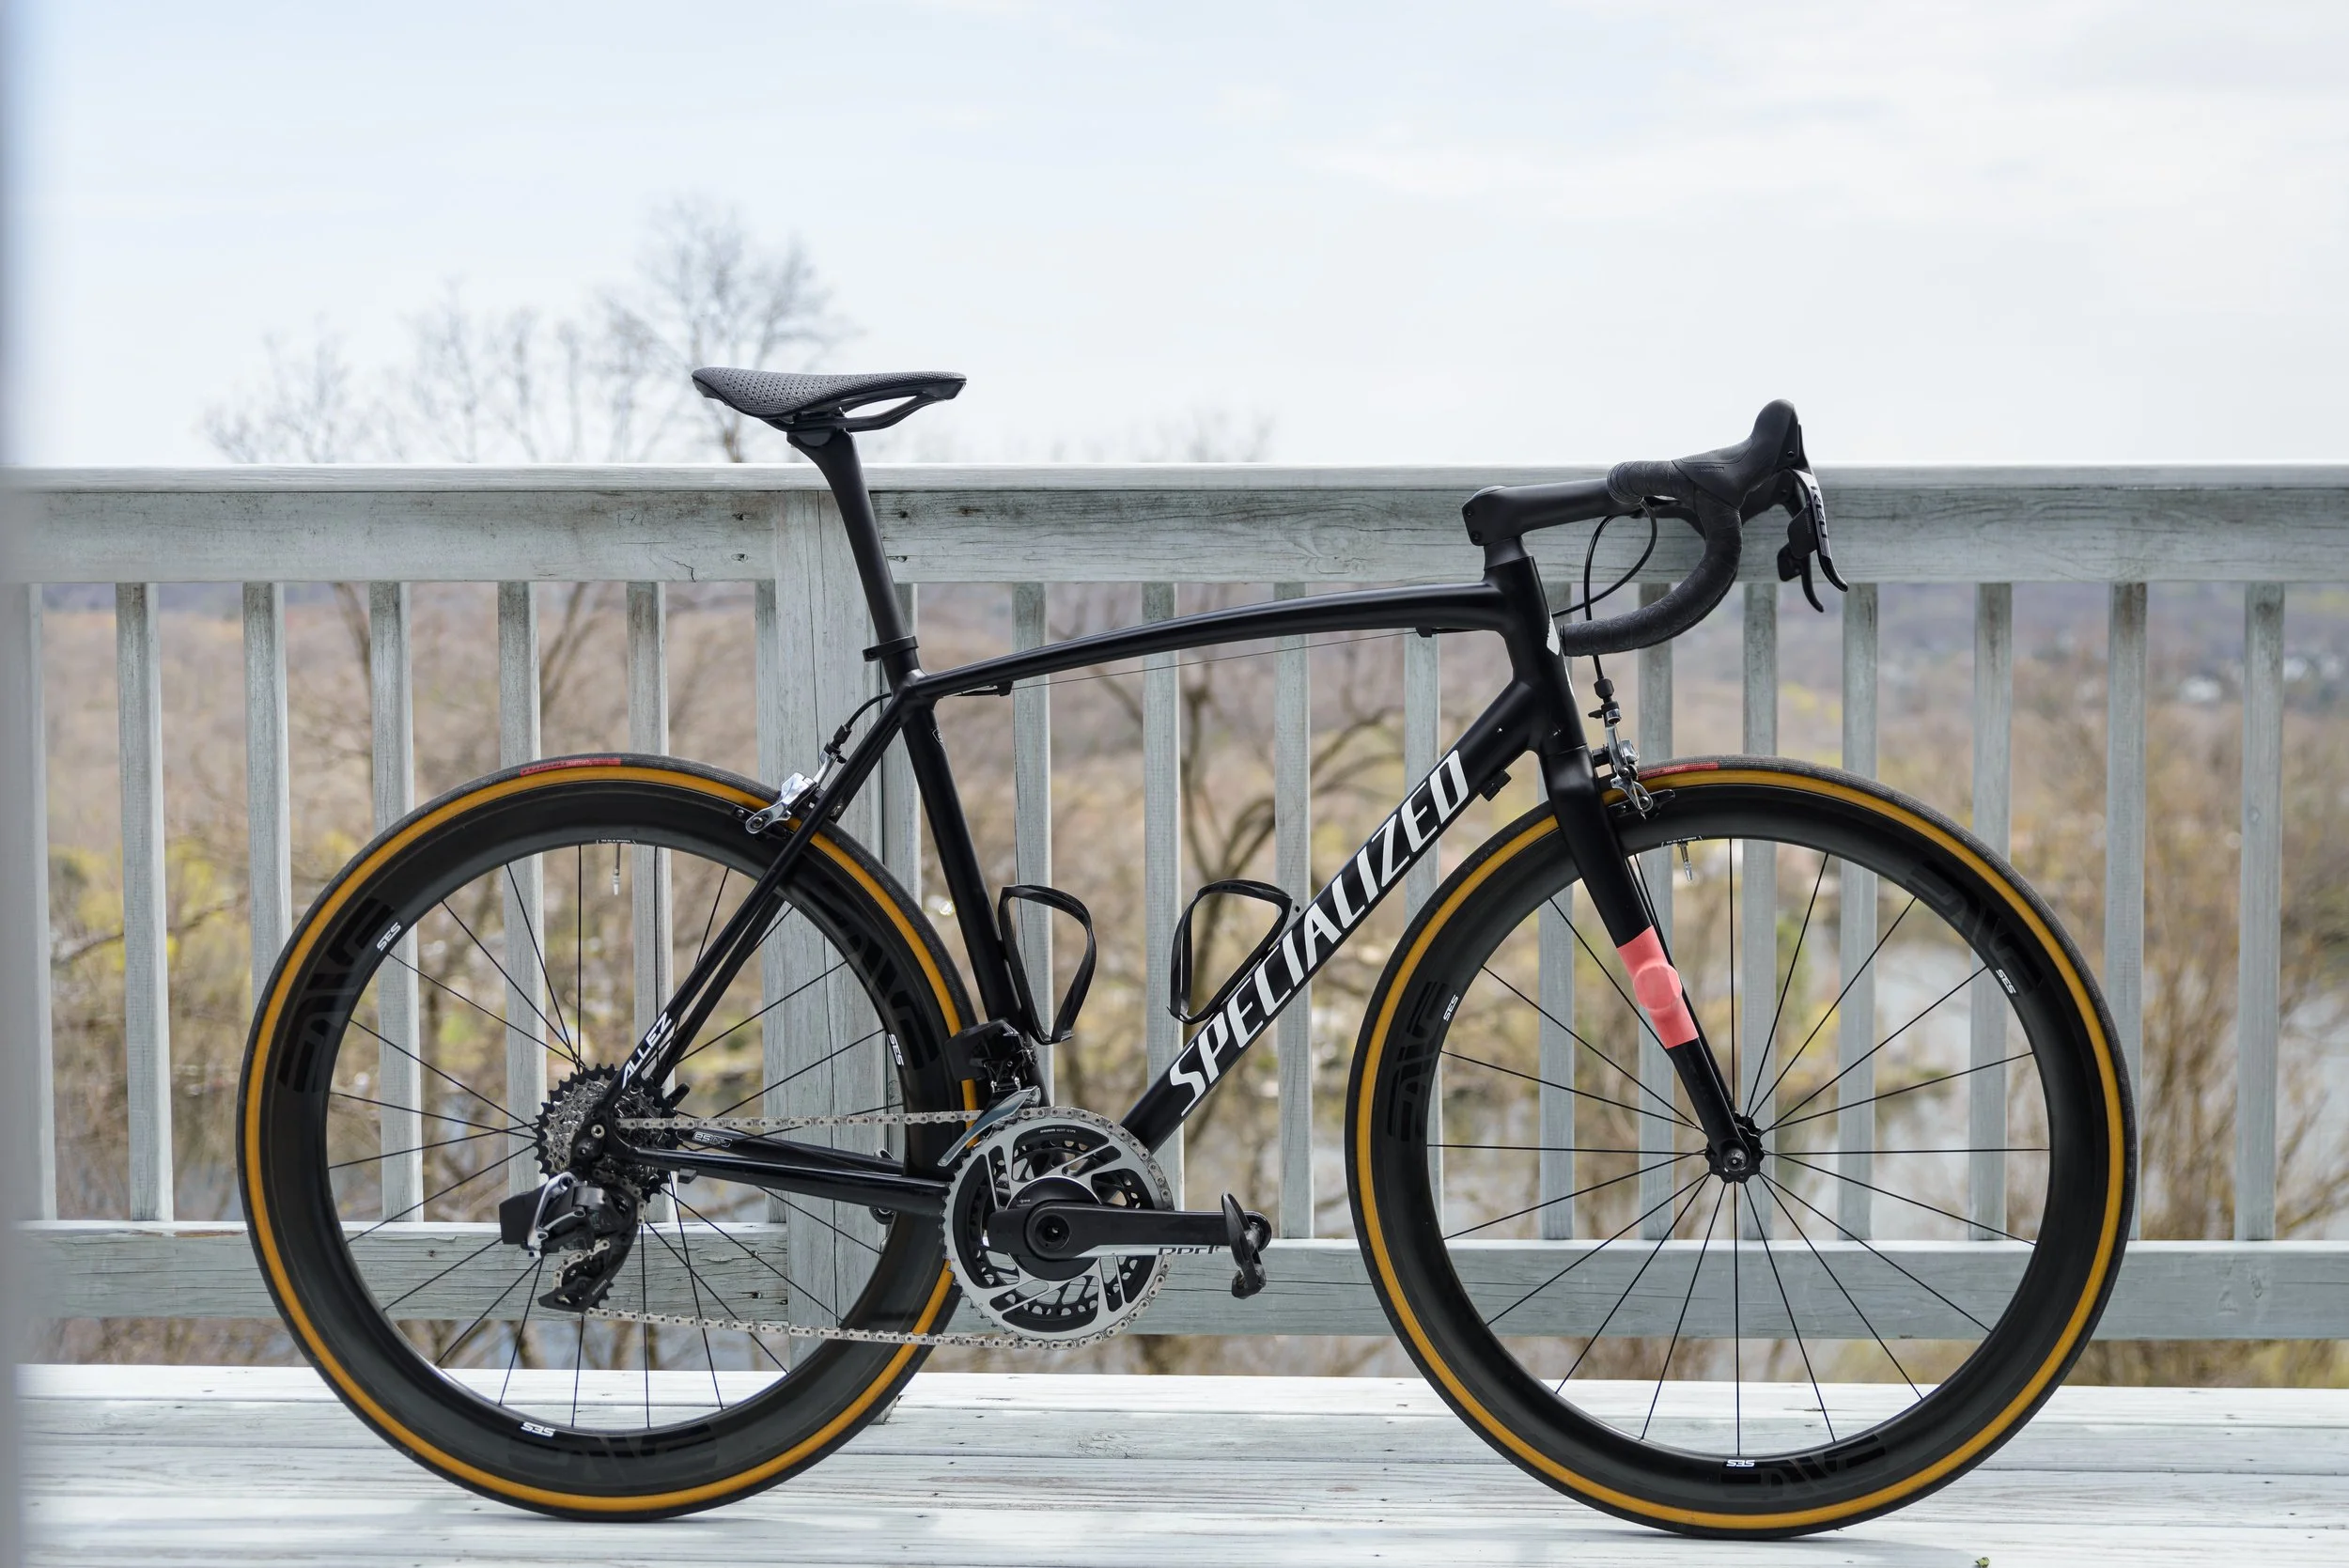
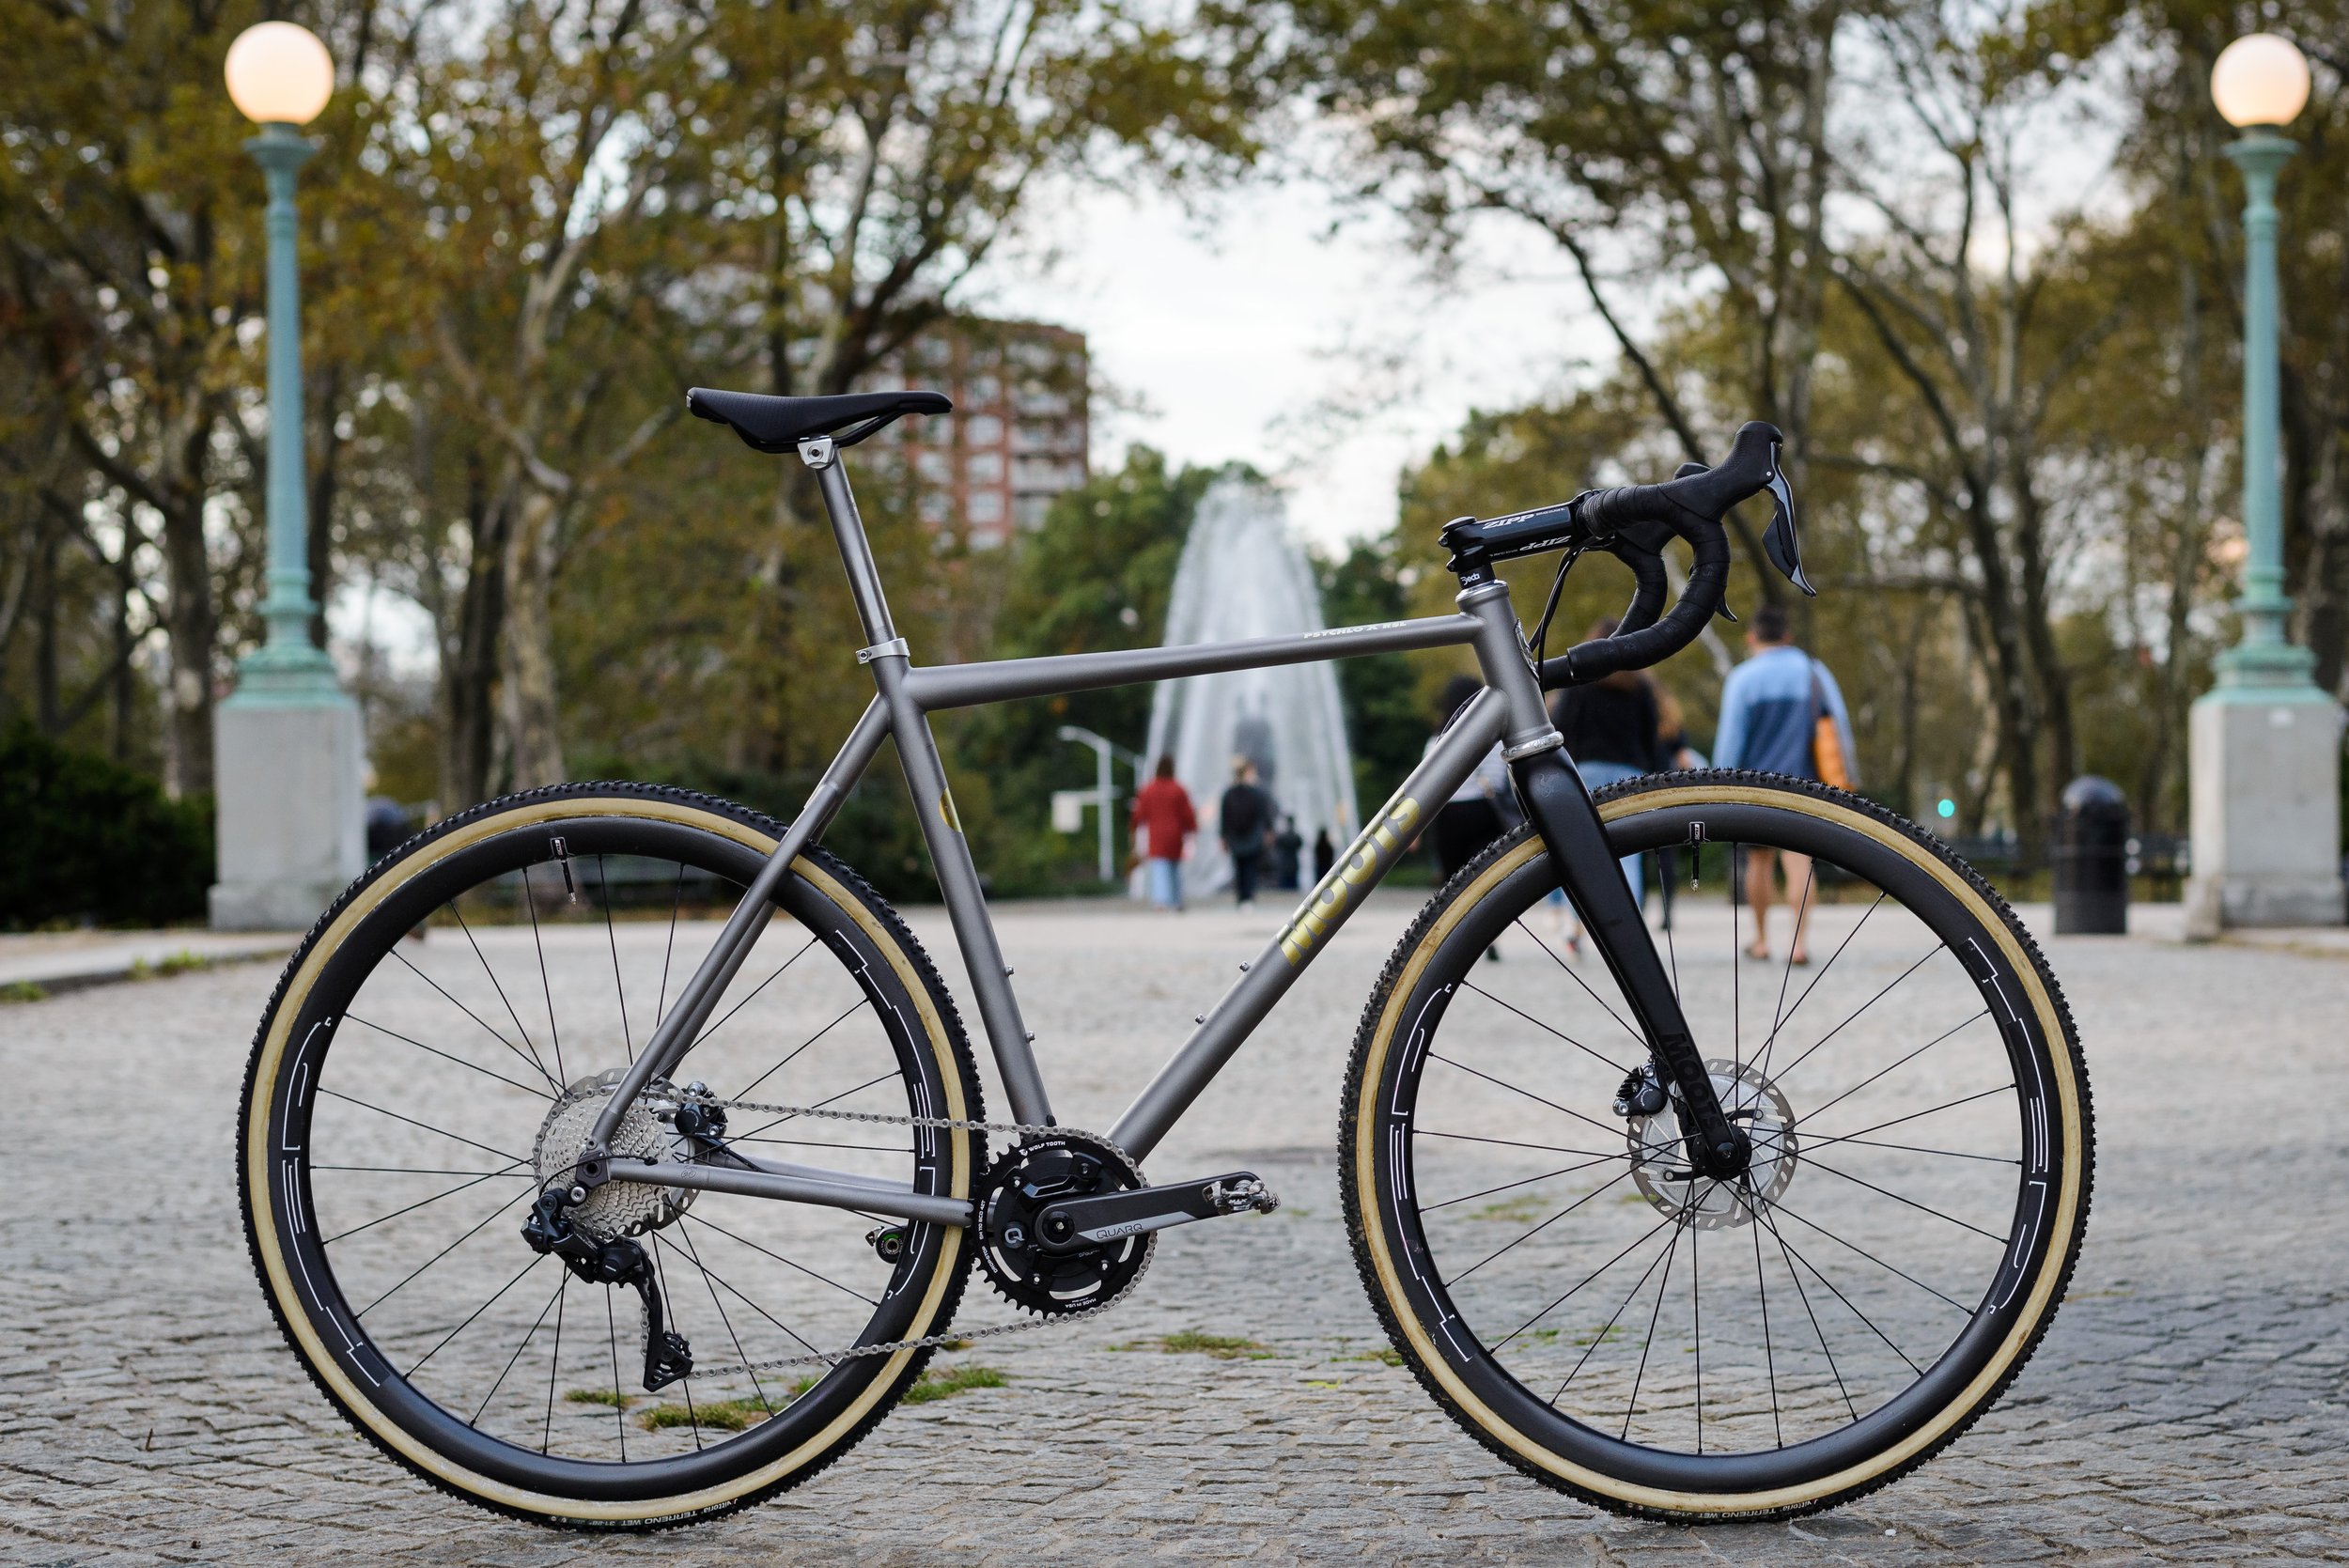
Some of my favourite “whole bike” shots:


Here are some instances where my photos could have been better: